
AWS Essential Services
In this blog you will get to know about EC2, IGW (Internet Gateway), VPC, Security Groups, Route Tables, NAT Gateway and Subnets.


Just follow this blog accordingly to get familiar with all the above services.
Here we go...
In this project we are creating a VPC with 2 Availability Zones consisting of public and private subnets than in the public subnet we are launching Webservers and in private we are launching a Database server and also we will configure NAT Gateway.
Here we are creating a VPC with a CIDR of 10.0.0.0/16 with 4 Subnets.
Among the 4 Subnets, 2 will be public subnets and another 2 will be private Subnets.
Create 2 Availability Zones and add Public and Private in each zone. We will launch 2 EC2 (Web Server) Instances in public subnets available in a different zone and 2 EC2 (Database Server) Instances in private subnets available in different zones.
Now login to your IAM User account and select the region,
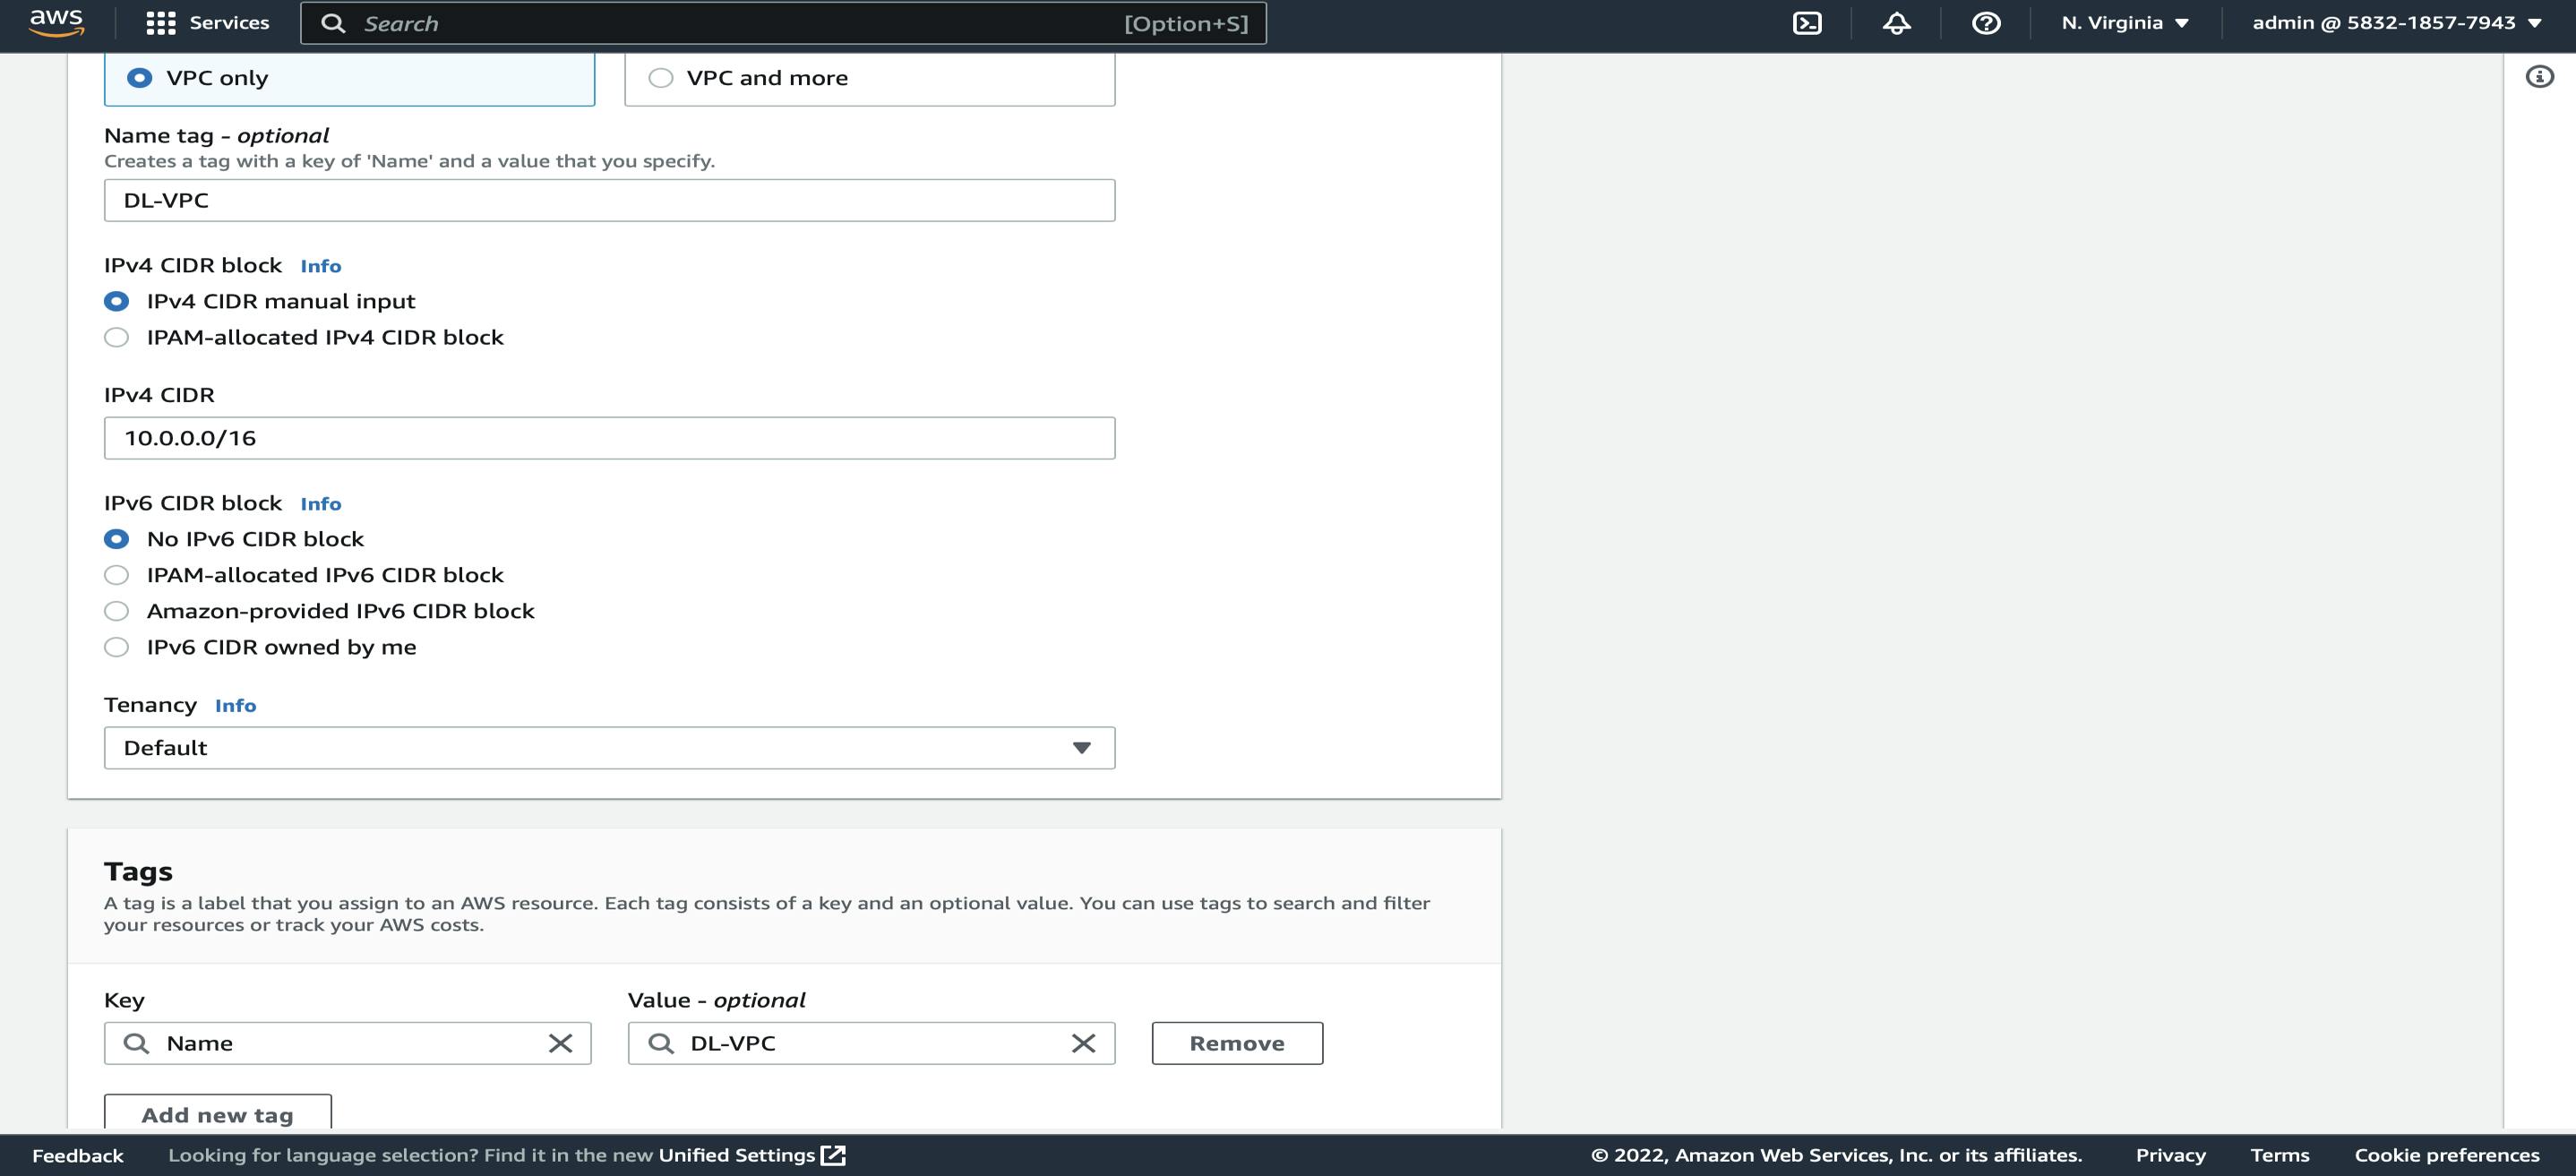
Select N.Virginia →Search for VPC-> VPC Dashboard → Left Side Pane Click on Your VPC's → Create VPC → Name (DL-VPC) → IPV4 CIDR (10.0.0.0/16) → Yes Create.
After creating VPC the actions that took place, No Subnets Were Created, No IGW is created.
A main route table has been created
Default NACL created with all inbound & outbound traffic allowed.
Default SG created with all outbound traffic allowed and inbound to only that particular security group
Now we must Create IGW (Internet Gateway), Route Tables & Subnets.
For creating Internet Gateway
VPC Dashboard → Left Side Pane Click on Internet Gateways → Create Internet Gateway → Name (DL-IGW)
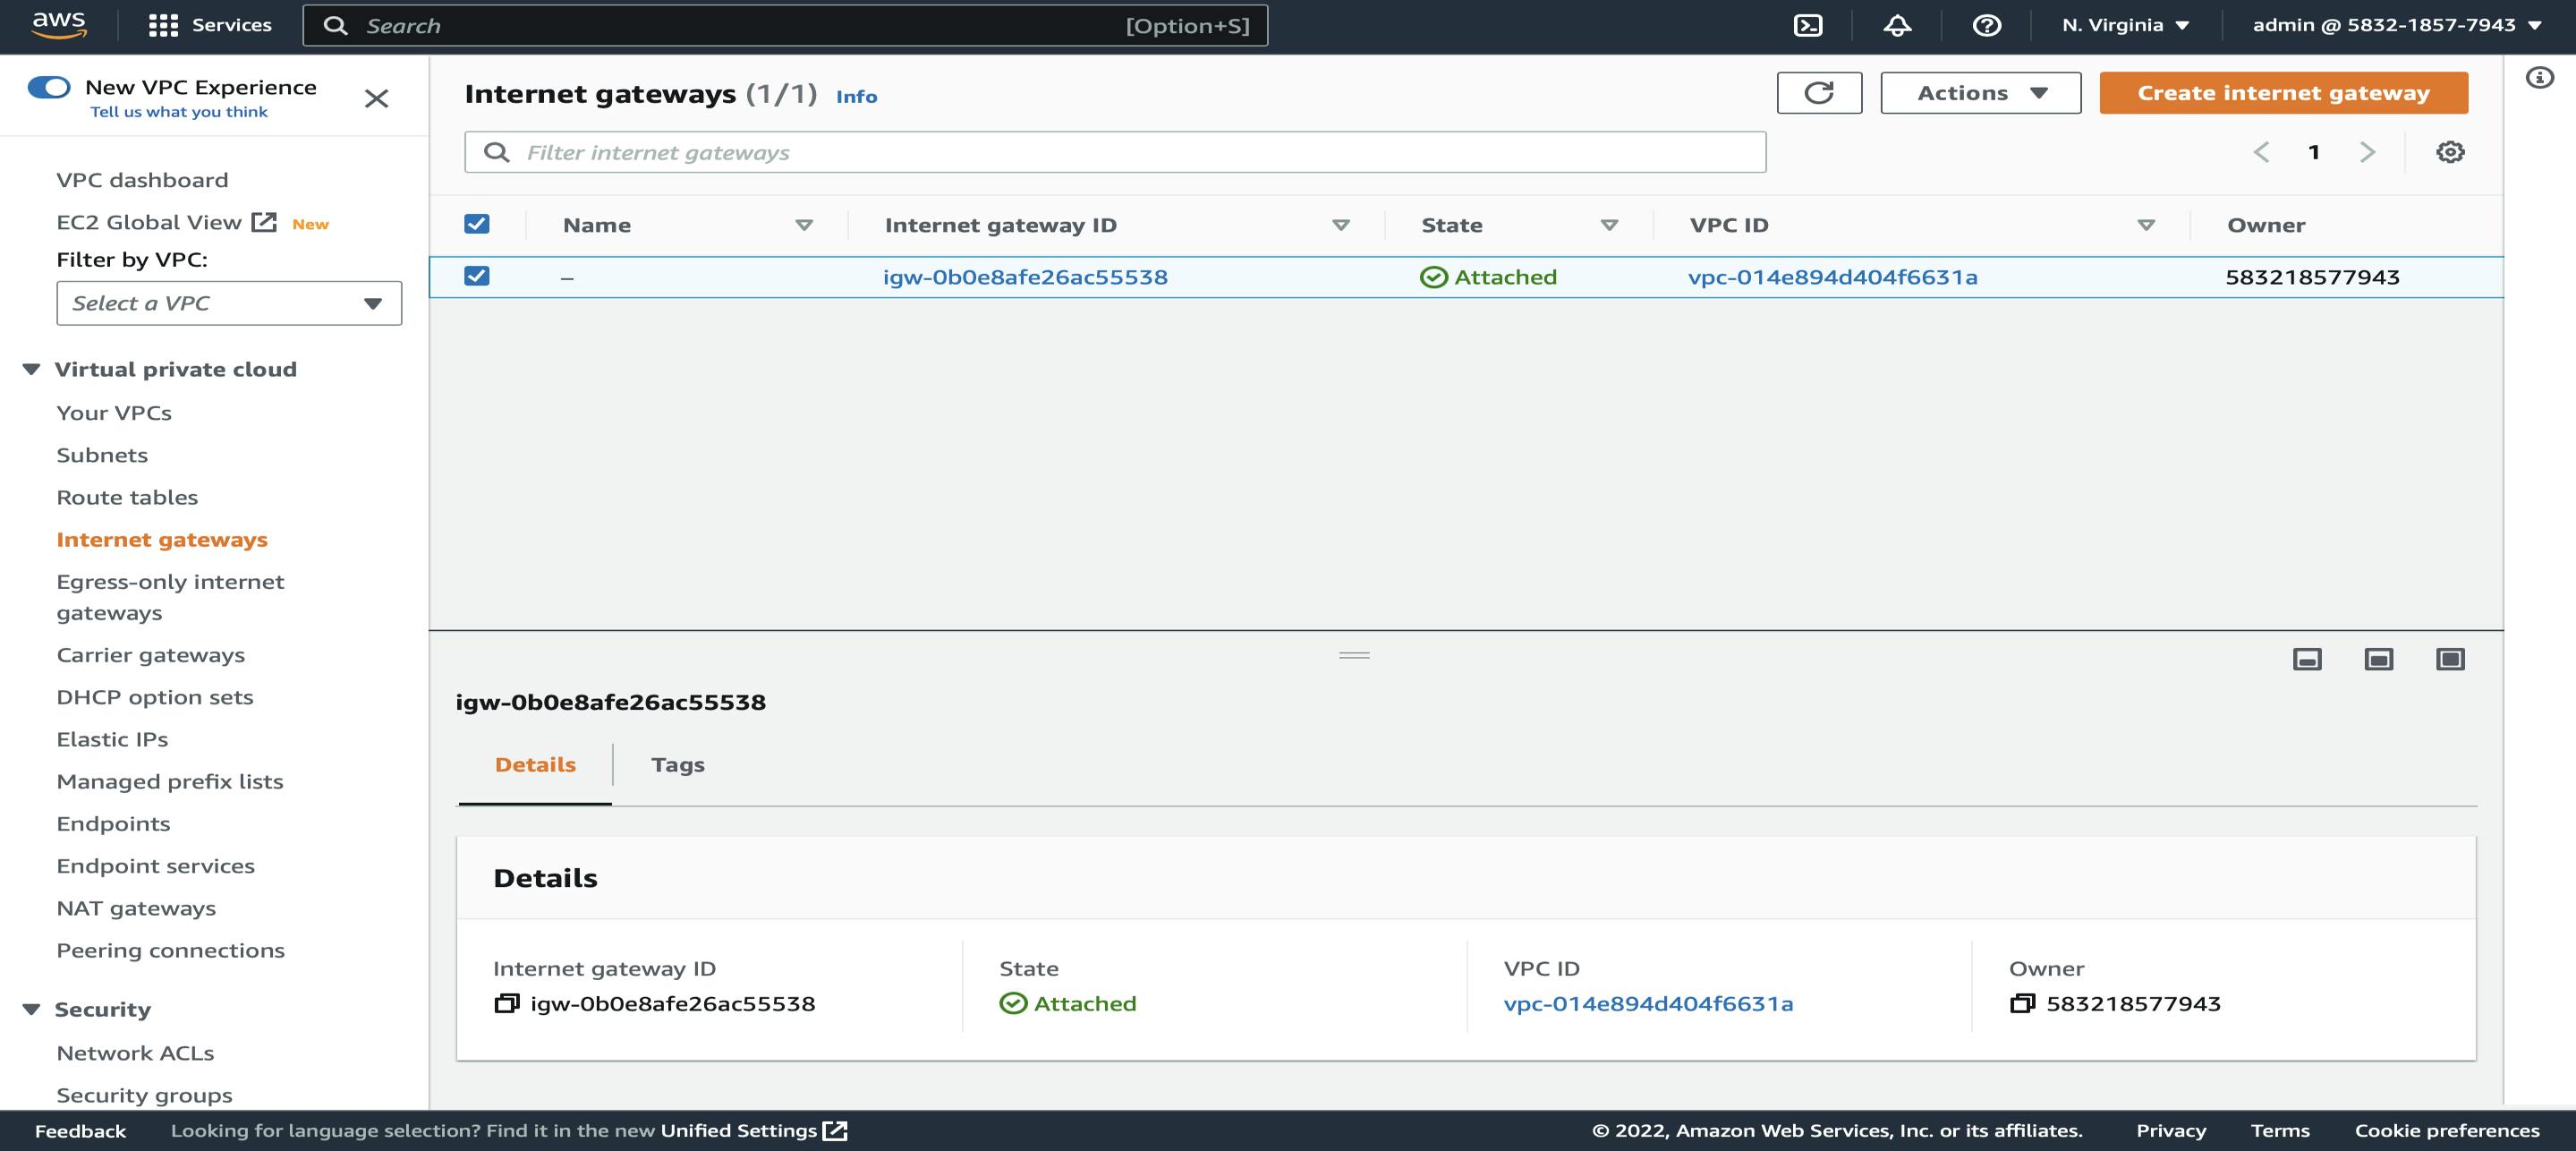
After creating Internet Gateway now attach it to our VPC (DL-VPC), for attaching click on Internet Gateways -> Attach VPC -> Select DL-VPC from the dropdown menu.

Now to check whether it has been successfully attached or not go back to Internet Gateways and check the state, it will show attached.
Now create 2 Route Tables, one is Public and the other one is Private.
VPC Dashboard → Left Side Pane Click on Route Tables → Create Route Table → Name (DL-RT-PUB) -> Select our VPC -> Create Route Table
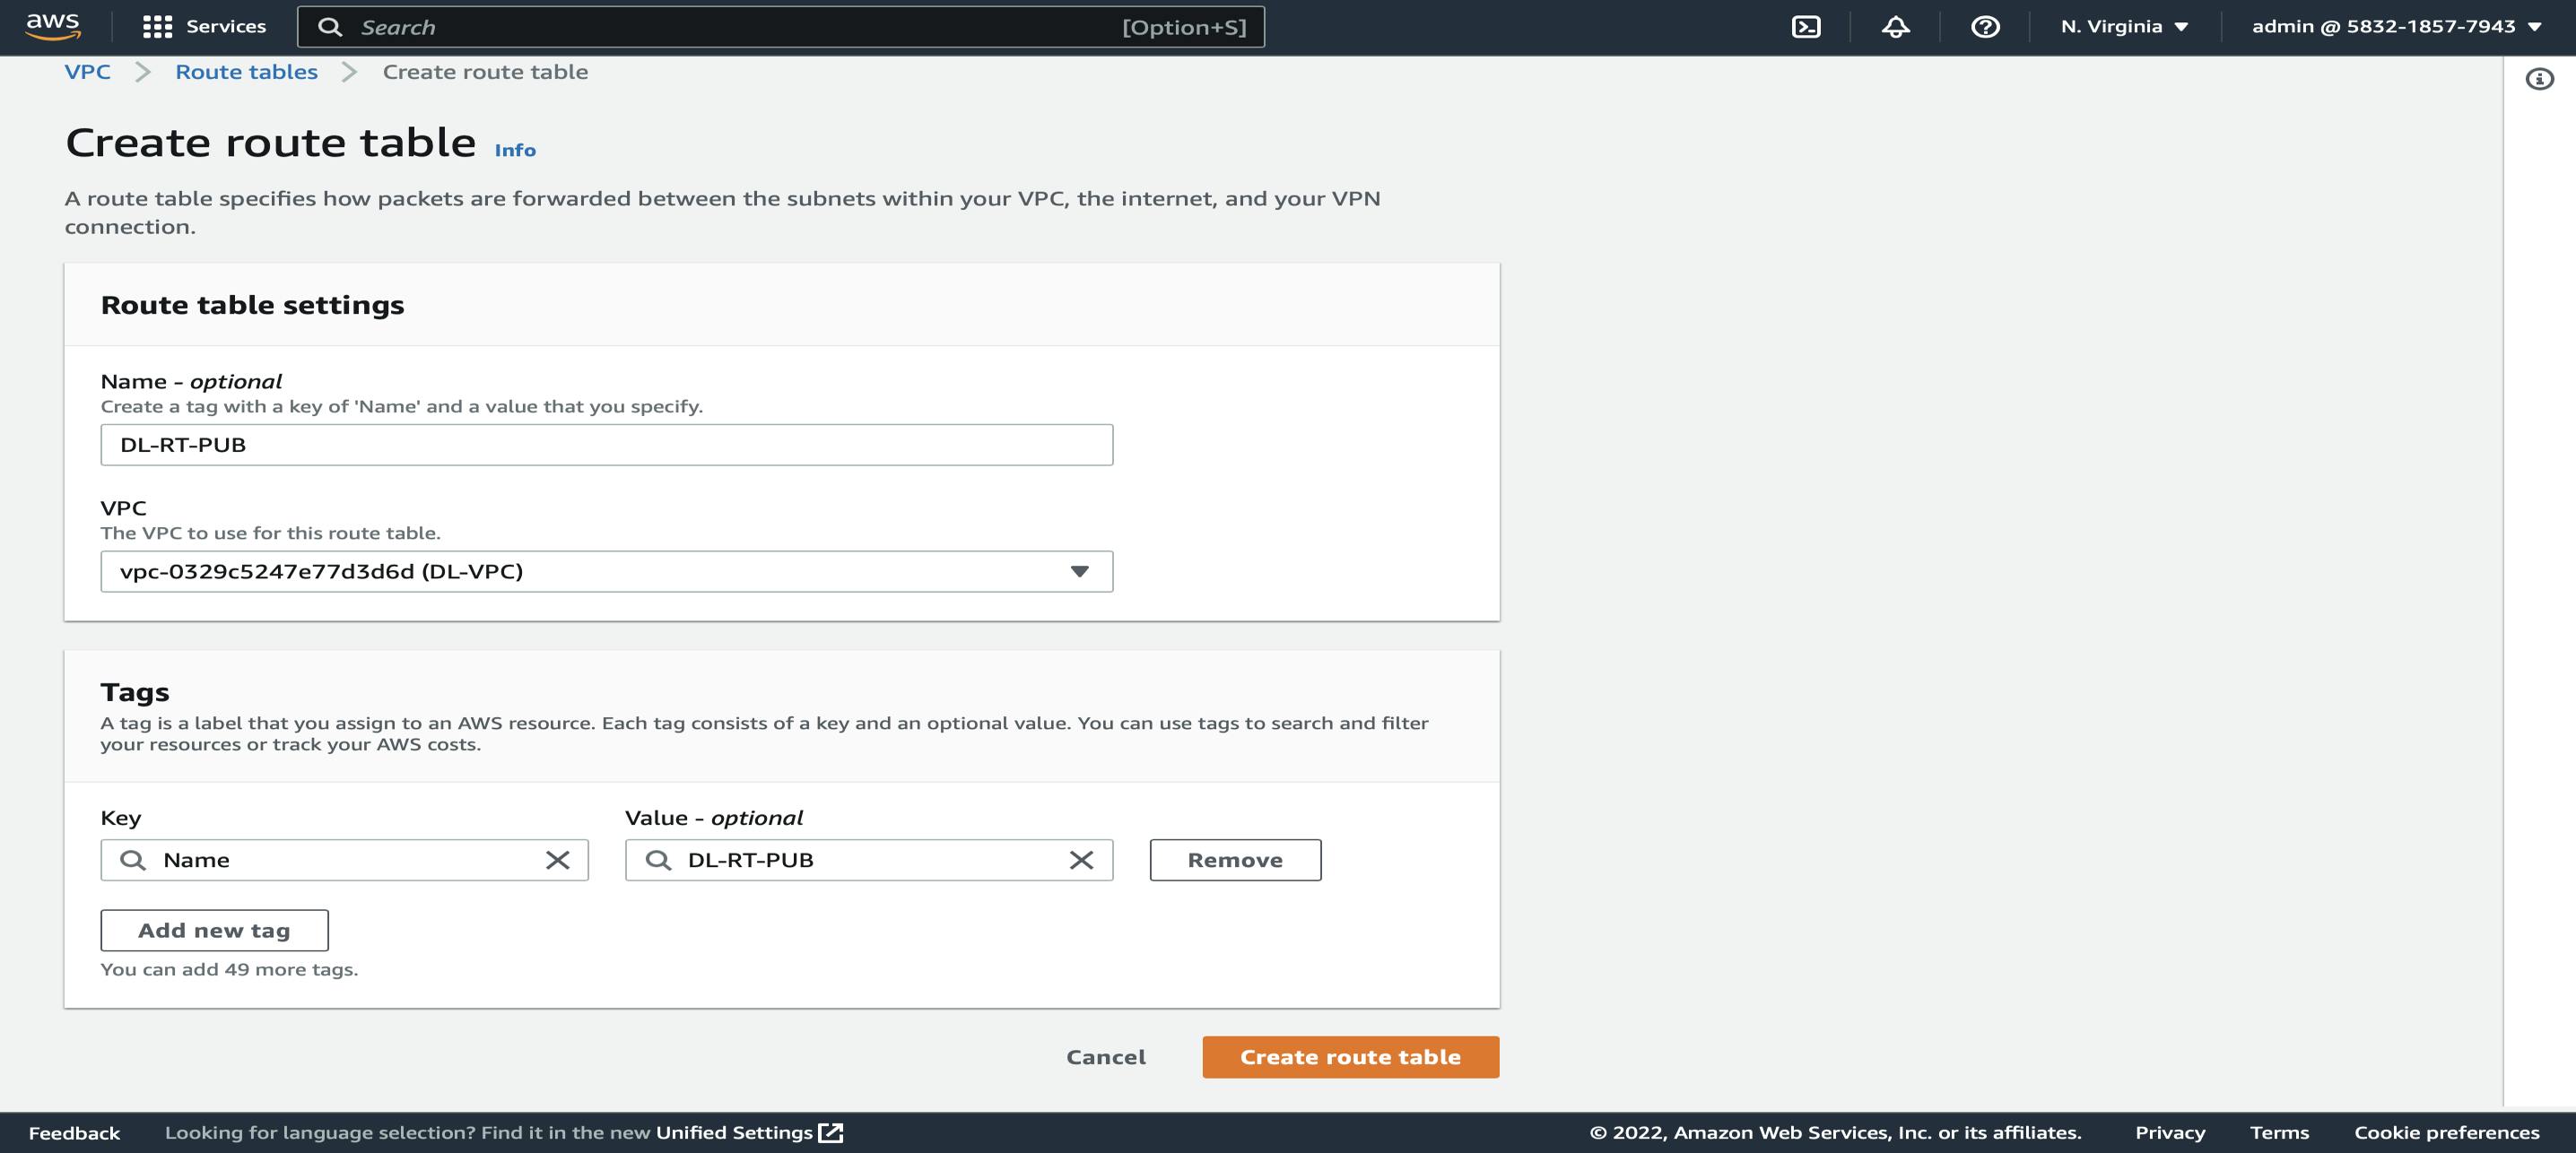
Similarly, create another Route Table and name it DL-RT-PVT.
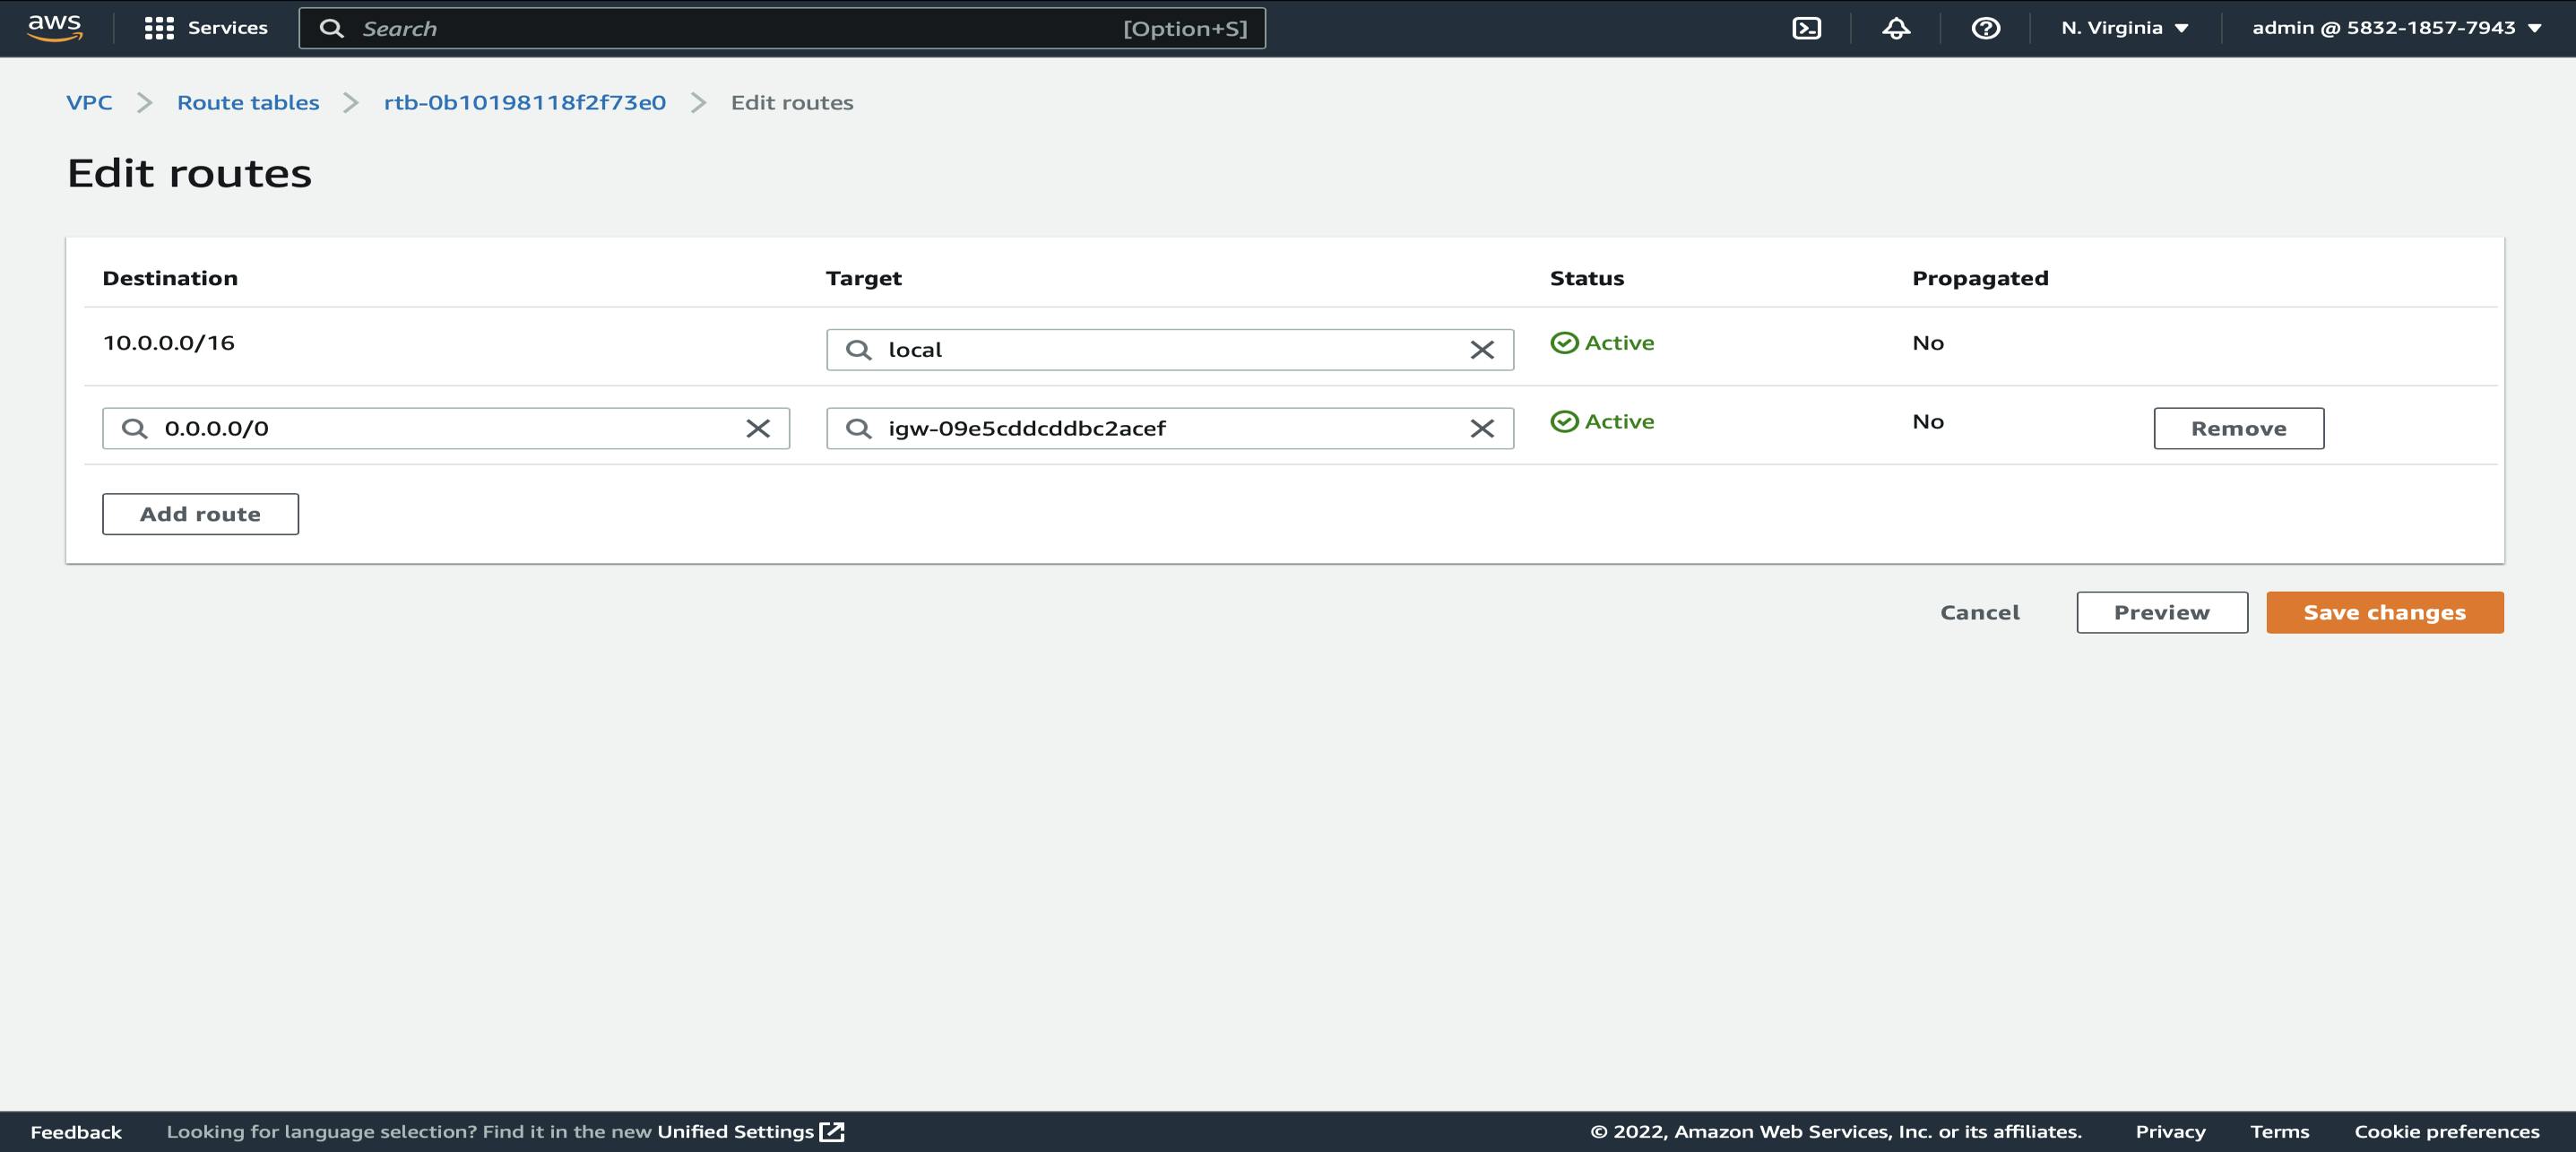
Now we need to edit the routes of the Public Route Table which is DL-RT-PUB
Select DL-RT-PUB -> Actions -> Edit Routes -> Add Route -> In the Destination field give 0.0.0.0/0 and target will be our Internet Gateway DL-IGW -> Save Changes.
We are not editing the routes of DL-RT-PVT which is a private route table.
Now we need to create 4 Subnets, 2 Public and 2 Private. Here we will use 2 Availability Zones which are us-east-1a and us-east-1b. In us-east-1a we will create one public subnet DL-SN-1-PUB and one private subnet DL-SN-2-PVT, similarly, in us-east-1b we will create one public subnet DL-SN-3-PUB and one private subnet DL-SN-4-PVT.
For creating Subnets go to VPC Dashboard.
NOTE: When you go to Subnets you can see there are already default subnets available. But here we are creating our Subnets.
VPC Dashboard → Left Side Pane Click on Subnets → Create Subnet → Choose DL-VPC → Name (DL-SN-1-PUB) → Set Availability Zone to US-East-1a → Set IPV4 CIDR to 10.0.1.0/24 → Yes Create.
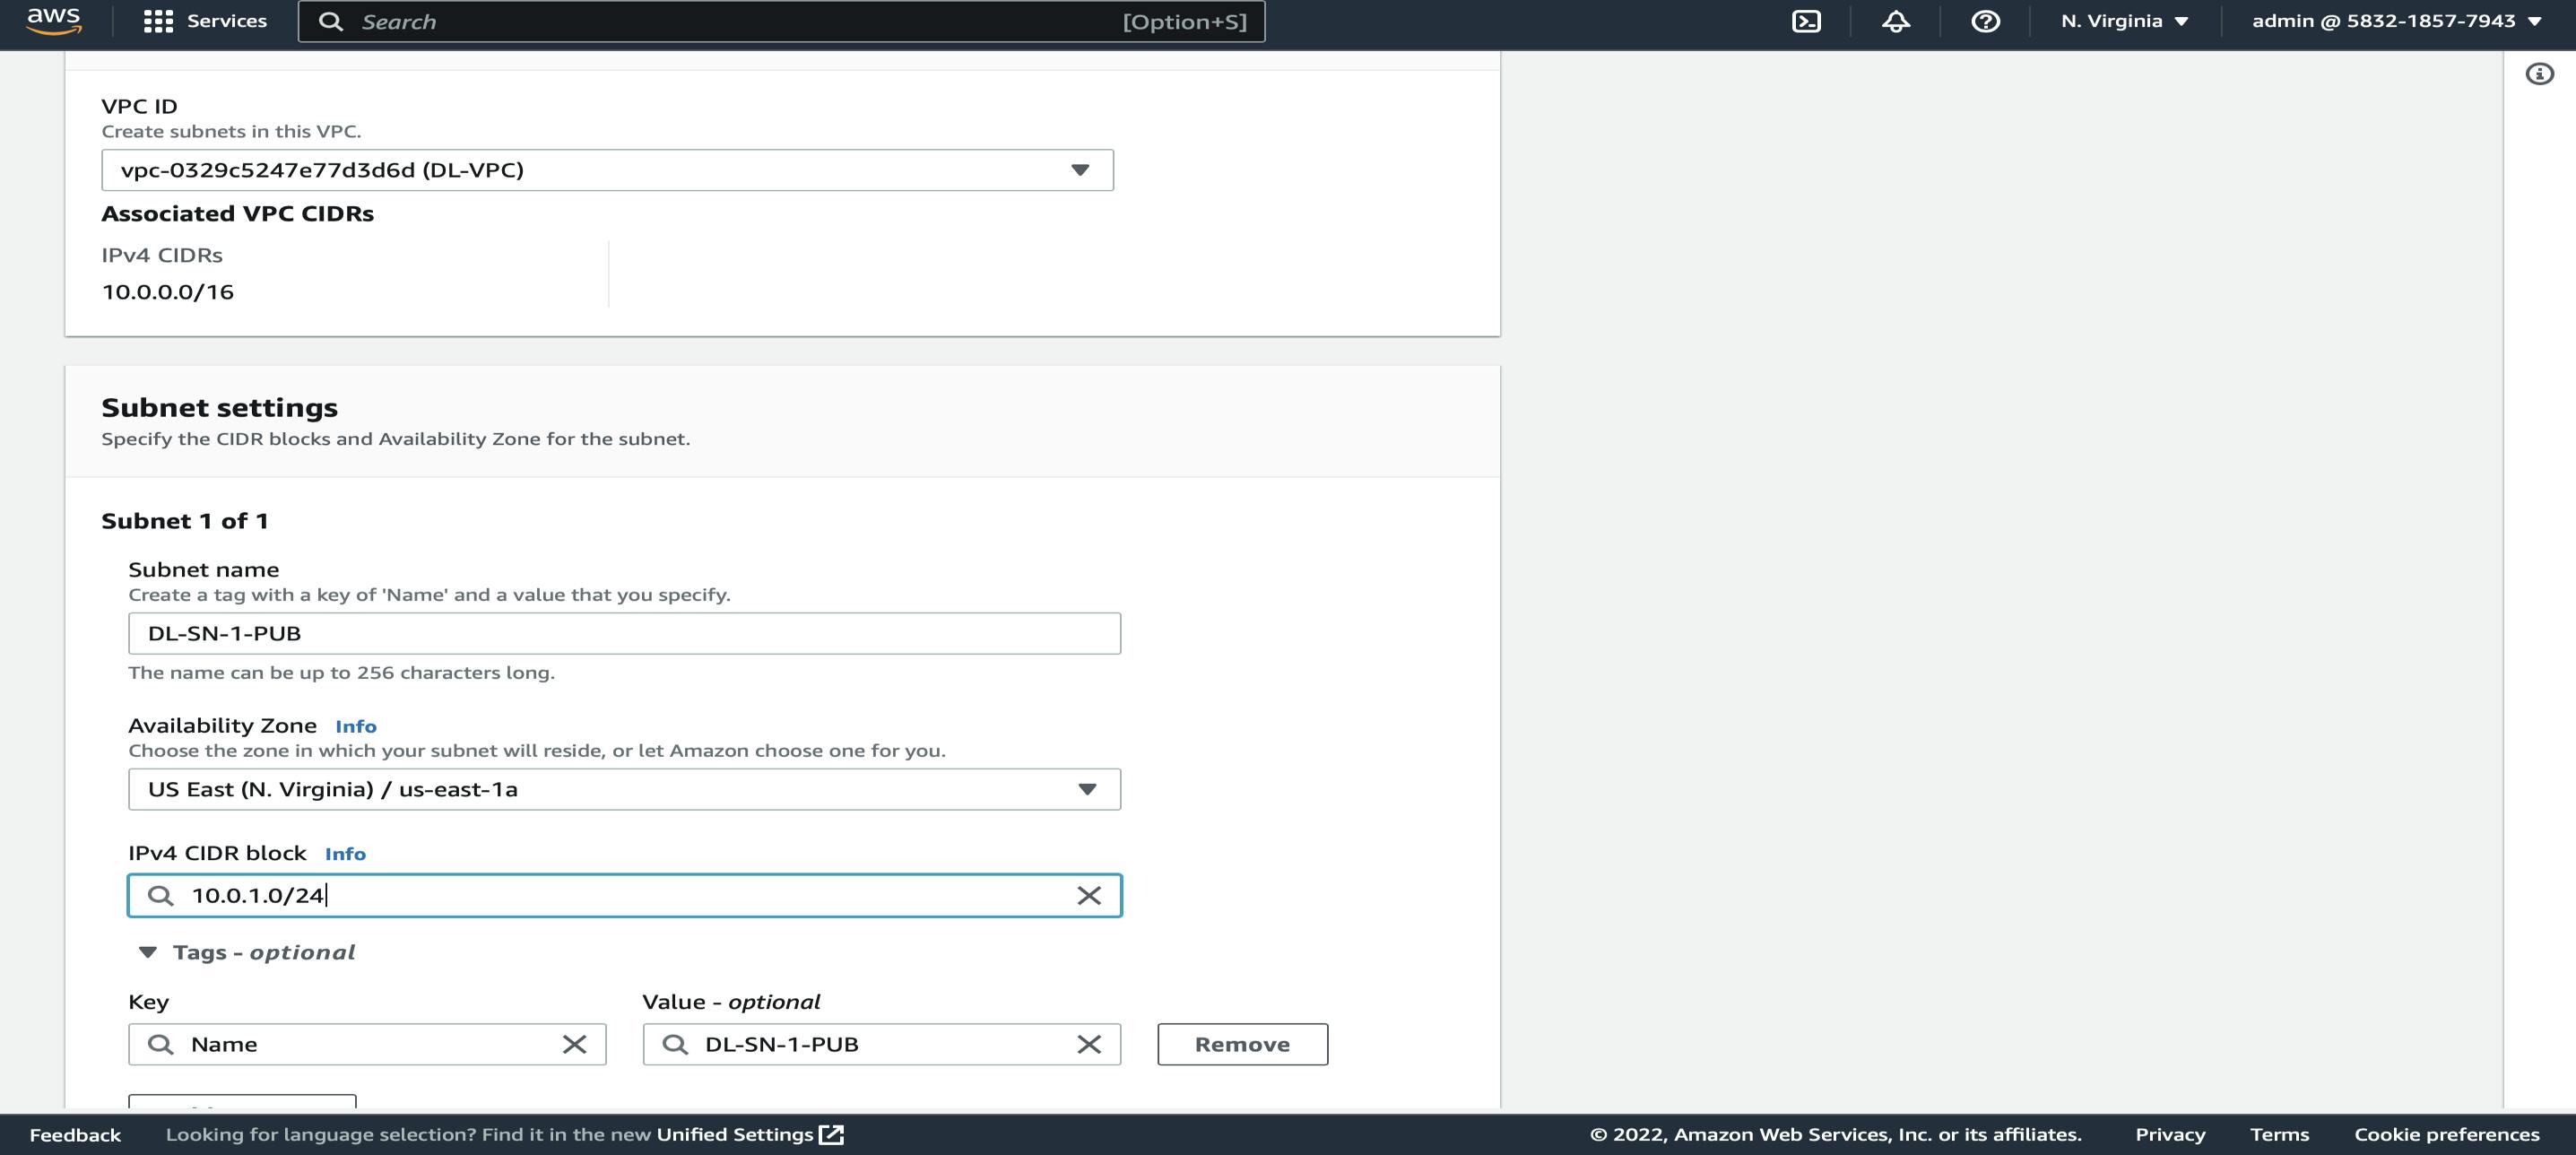
Now we need to Enable Auto-Assign IP Settings for the newly created Subnet DL-SN-1-PUB
Select DL-SN-1-PUB -> Actions -> Edit Subnet Settings -> Enable Auto-Assign IP Settings -> Save
Enabling the auto-assign IP settings to automatically request a public IPv4 or IPv6 address for a new network interface in this subnet.
Similarly, we must create another Subnet which is Private.
VPC Dashboard → Left Side Pane Click on Subnets → Create Subnet → Choose DL-VPC → Name (DL-SN-2-PVT) → Set Availability Zone to US-East-1a → Set IPV4 CIDR to 10.0.2.0/24 → Yes Create.
NOTE: We are not enabling auto-assign for Private Subnet.
In the same way, we need to create 2 more Subnets in the us-east-1b Availability Zone which is Private and Public. And make sure that you set IPV4 CIDR 10.0.3.0 and 10.0.4.0 for private and public subnets. And enable Auto-Assign Ip Settings for public subnet.
Now we need to associate our subnets with the correct route tables.
Go to Route Tables select DL-RT-PUB -> Actions -> Edit Subnet Association -> Select Public Subnets (DL-SN-1-PUB and DL-SN-3-PUB) → Save Associations.
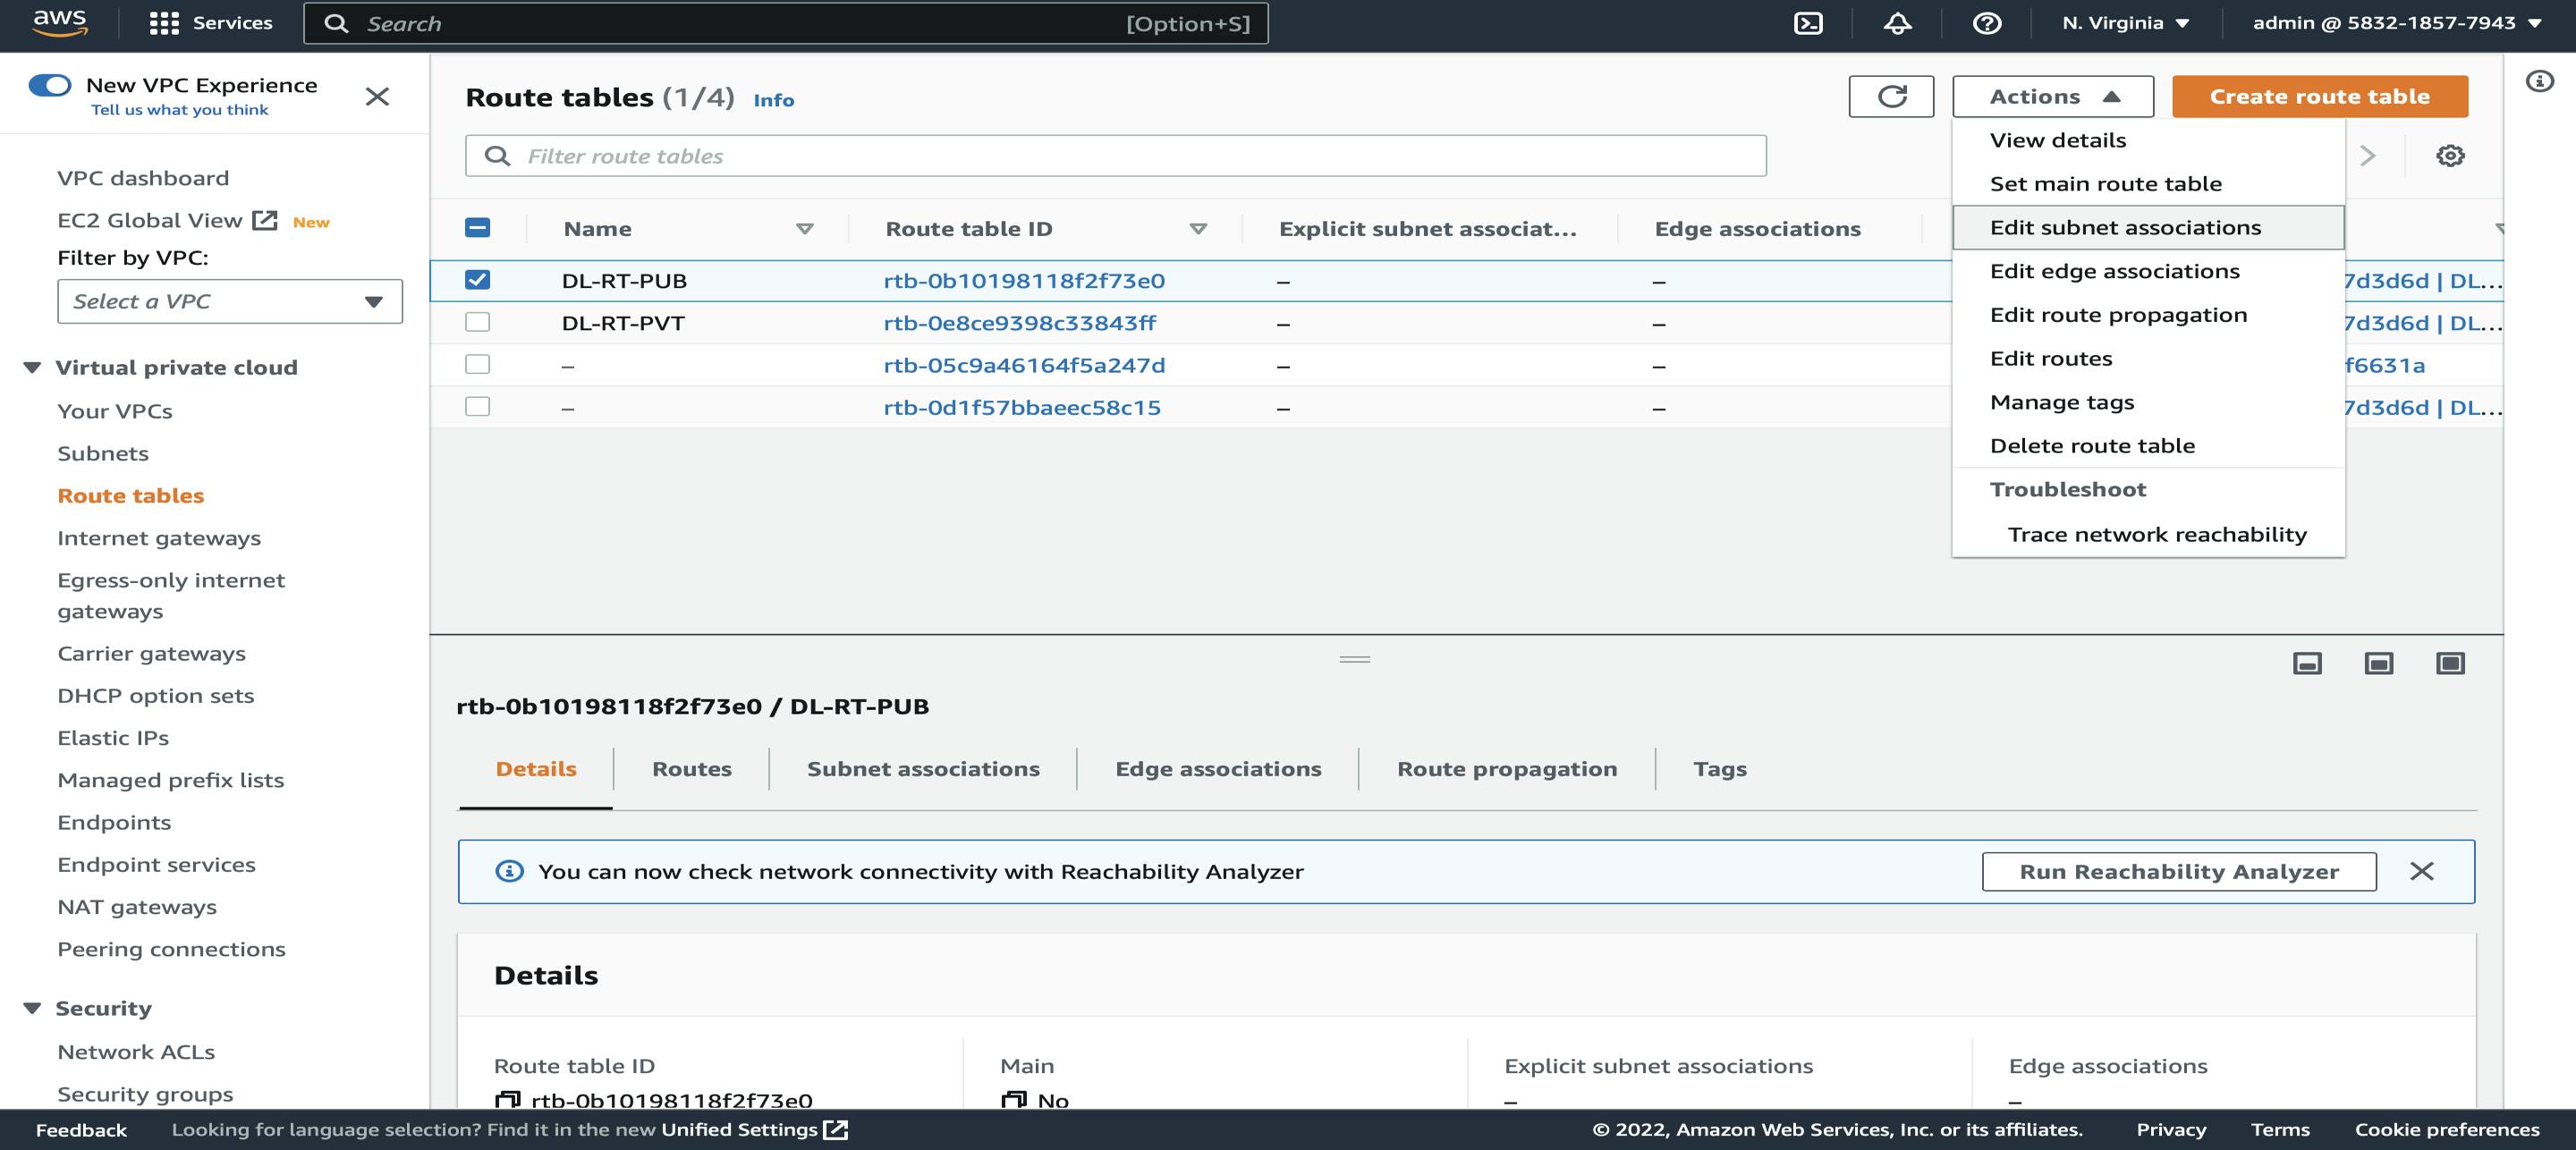
Go to Route Tables select DL-RT-PVT -> Actions -> Edit Subnet Association -> Select private Subnets (DL-SN-2-PVT and DL-SN-4-PVT ) → Save Associations.
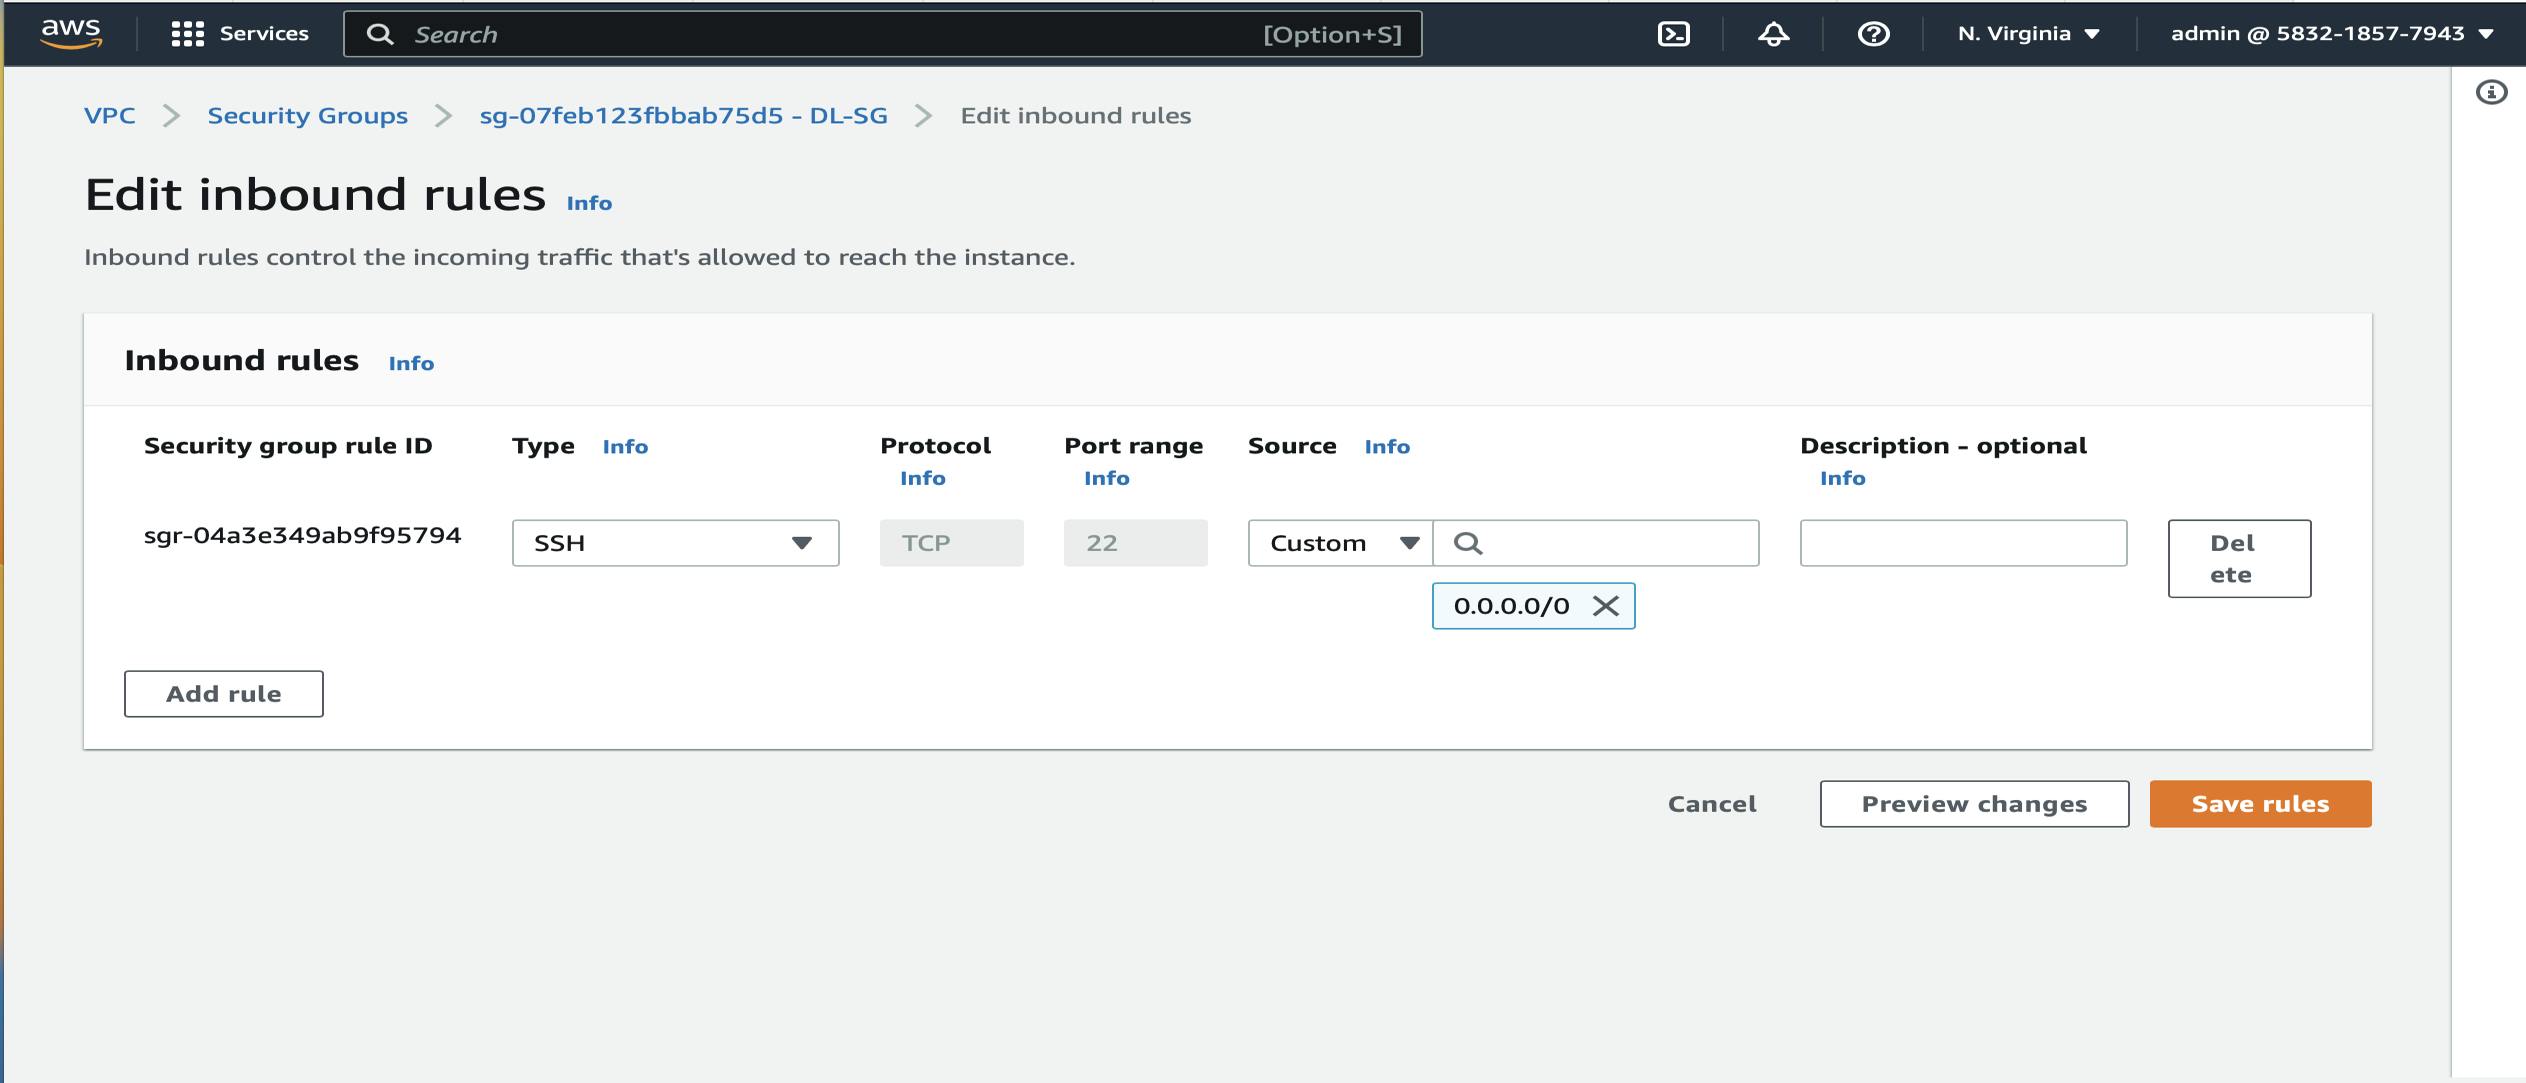
Now create a security group to allow SSH Access
VPC Dashboard → Security → Select Security Groups → Create Security Group (DL-SG-SSH) → Select DL-VPC → Click Inbound Rules → Add Rules -> Type SSH and Source to 0.0.0.0/0 → Save
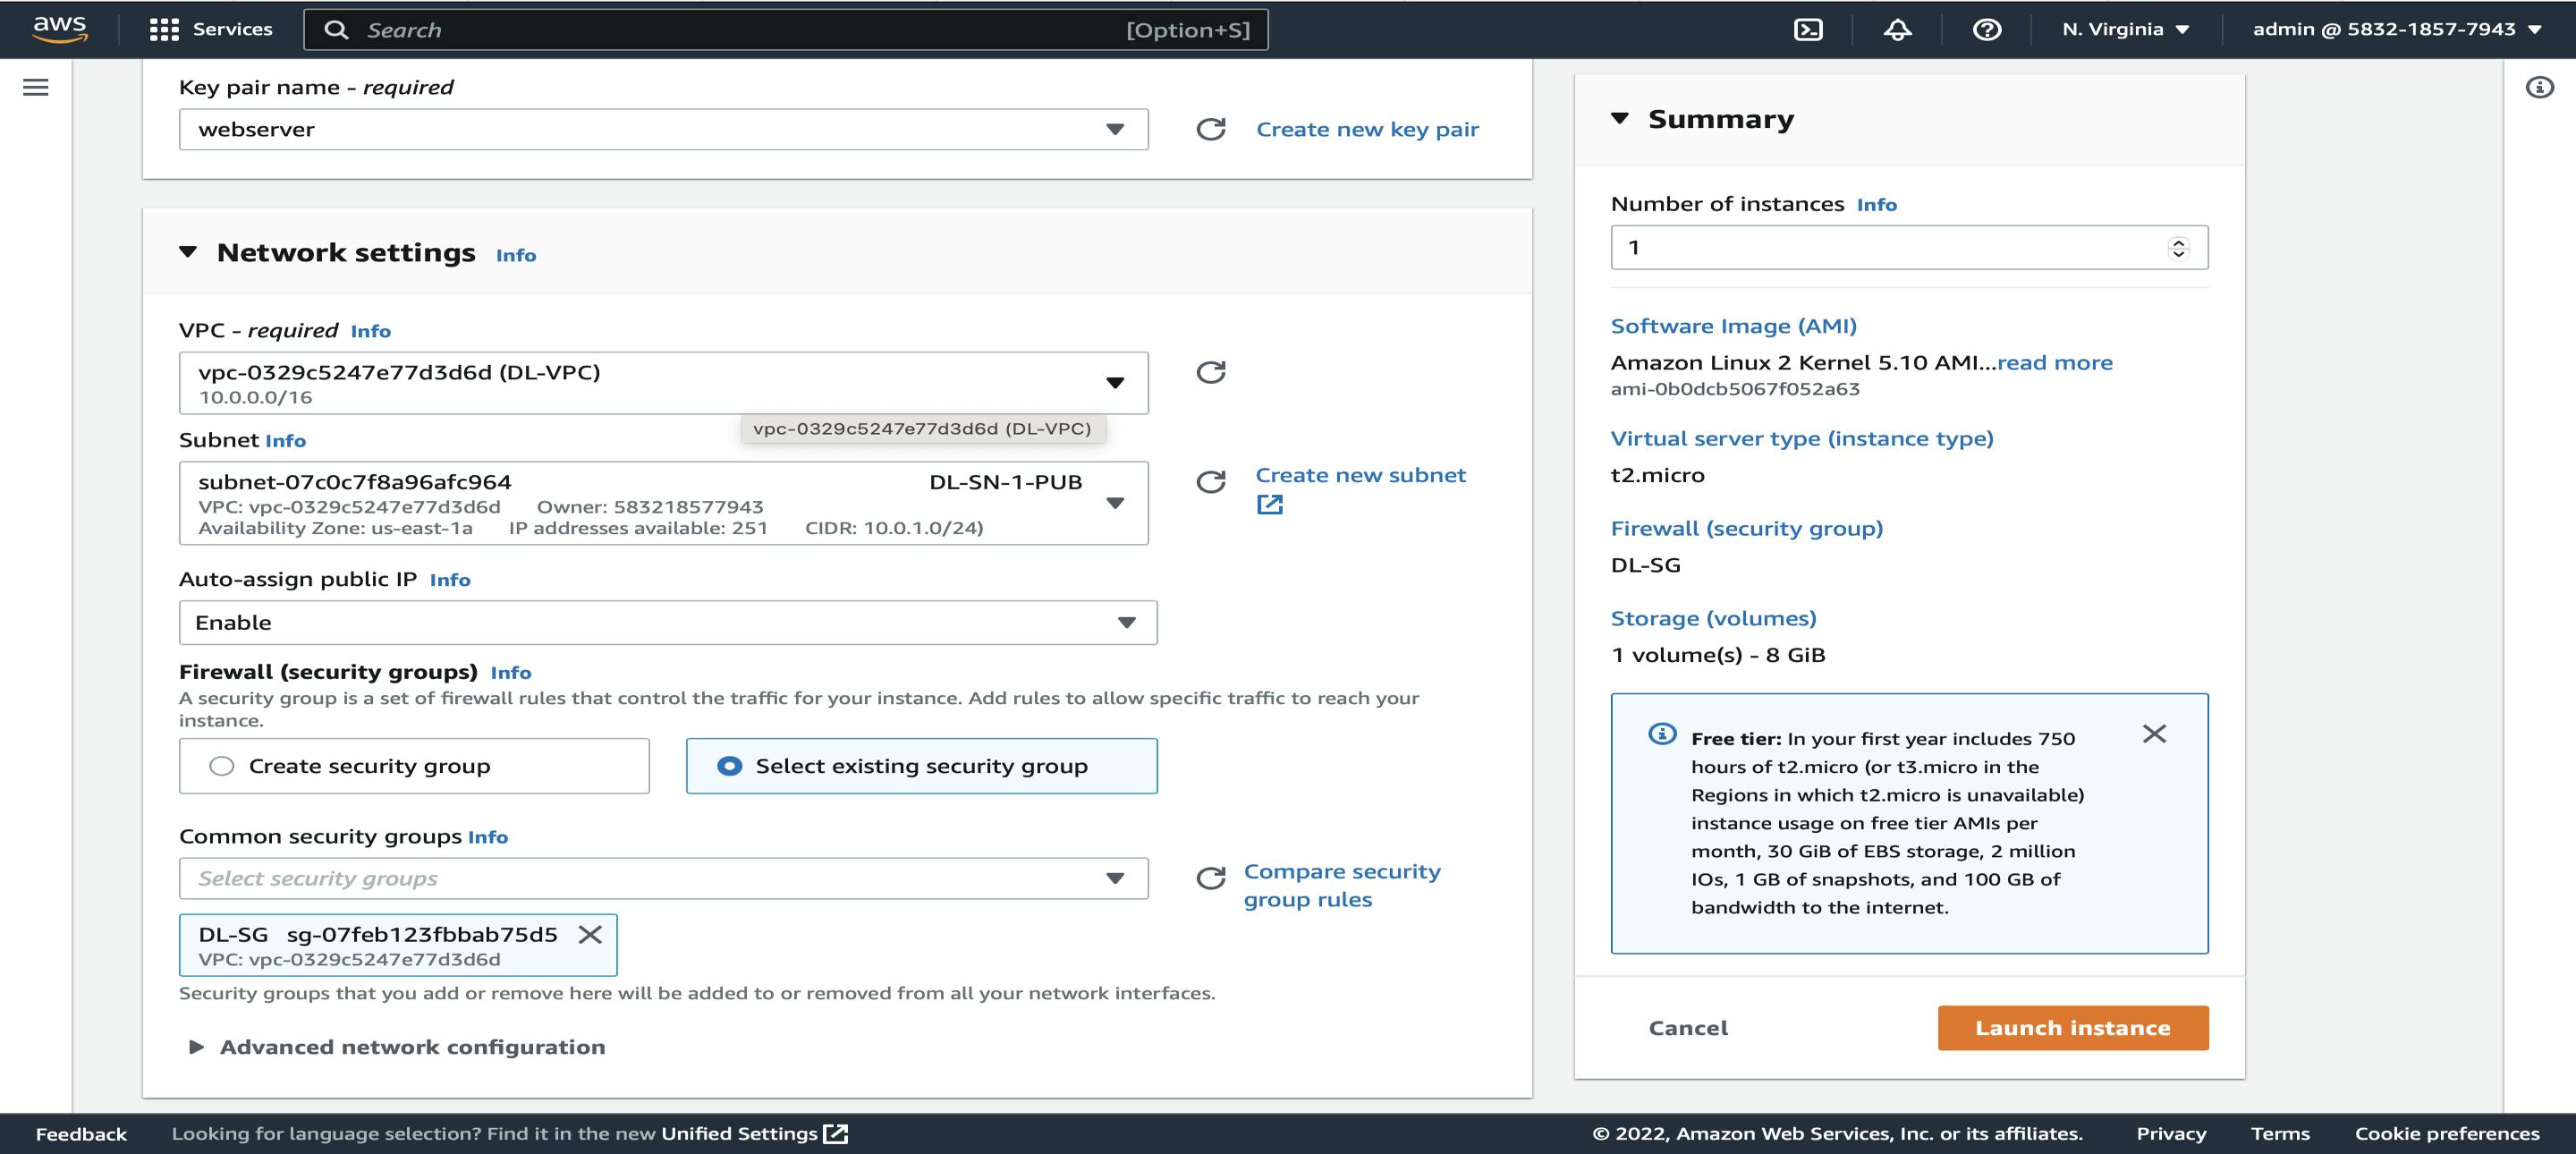
Now create EC2 Instances in public and private subnets,
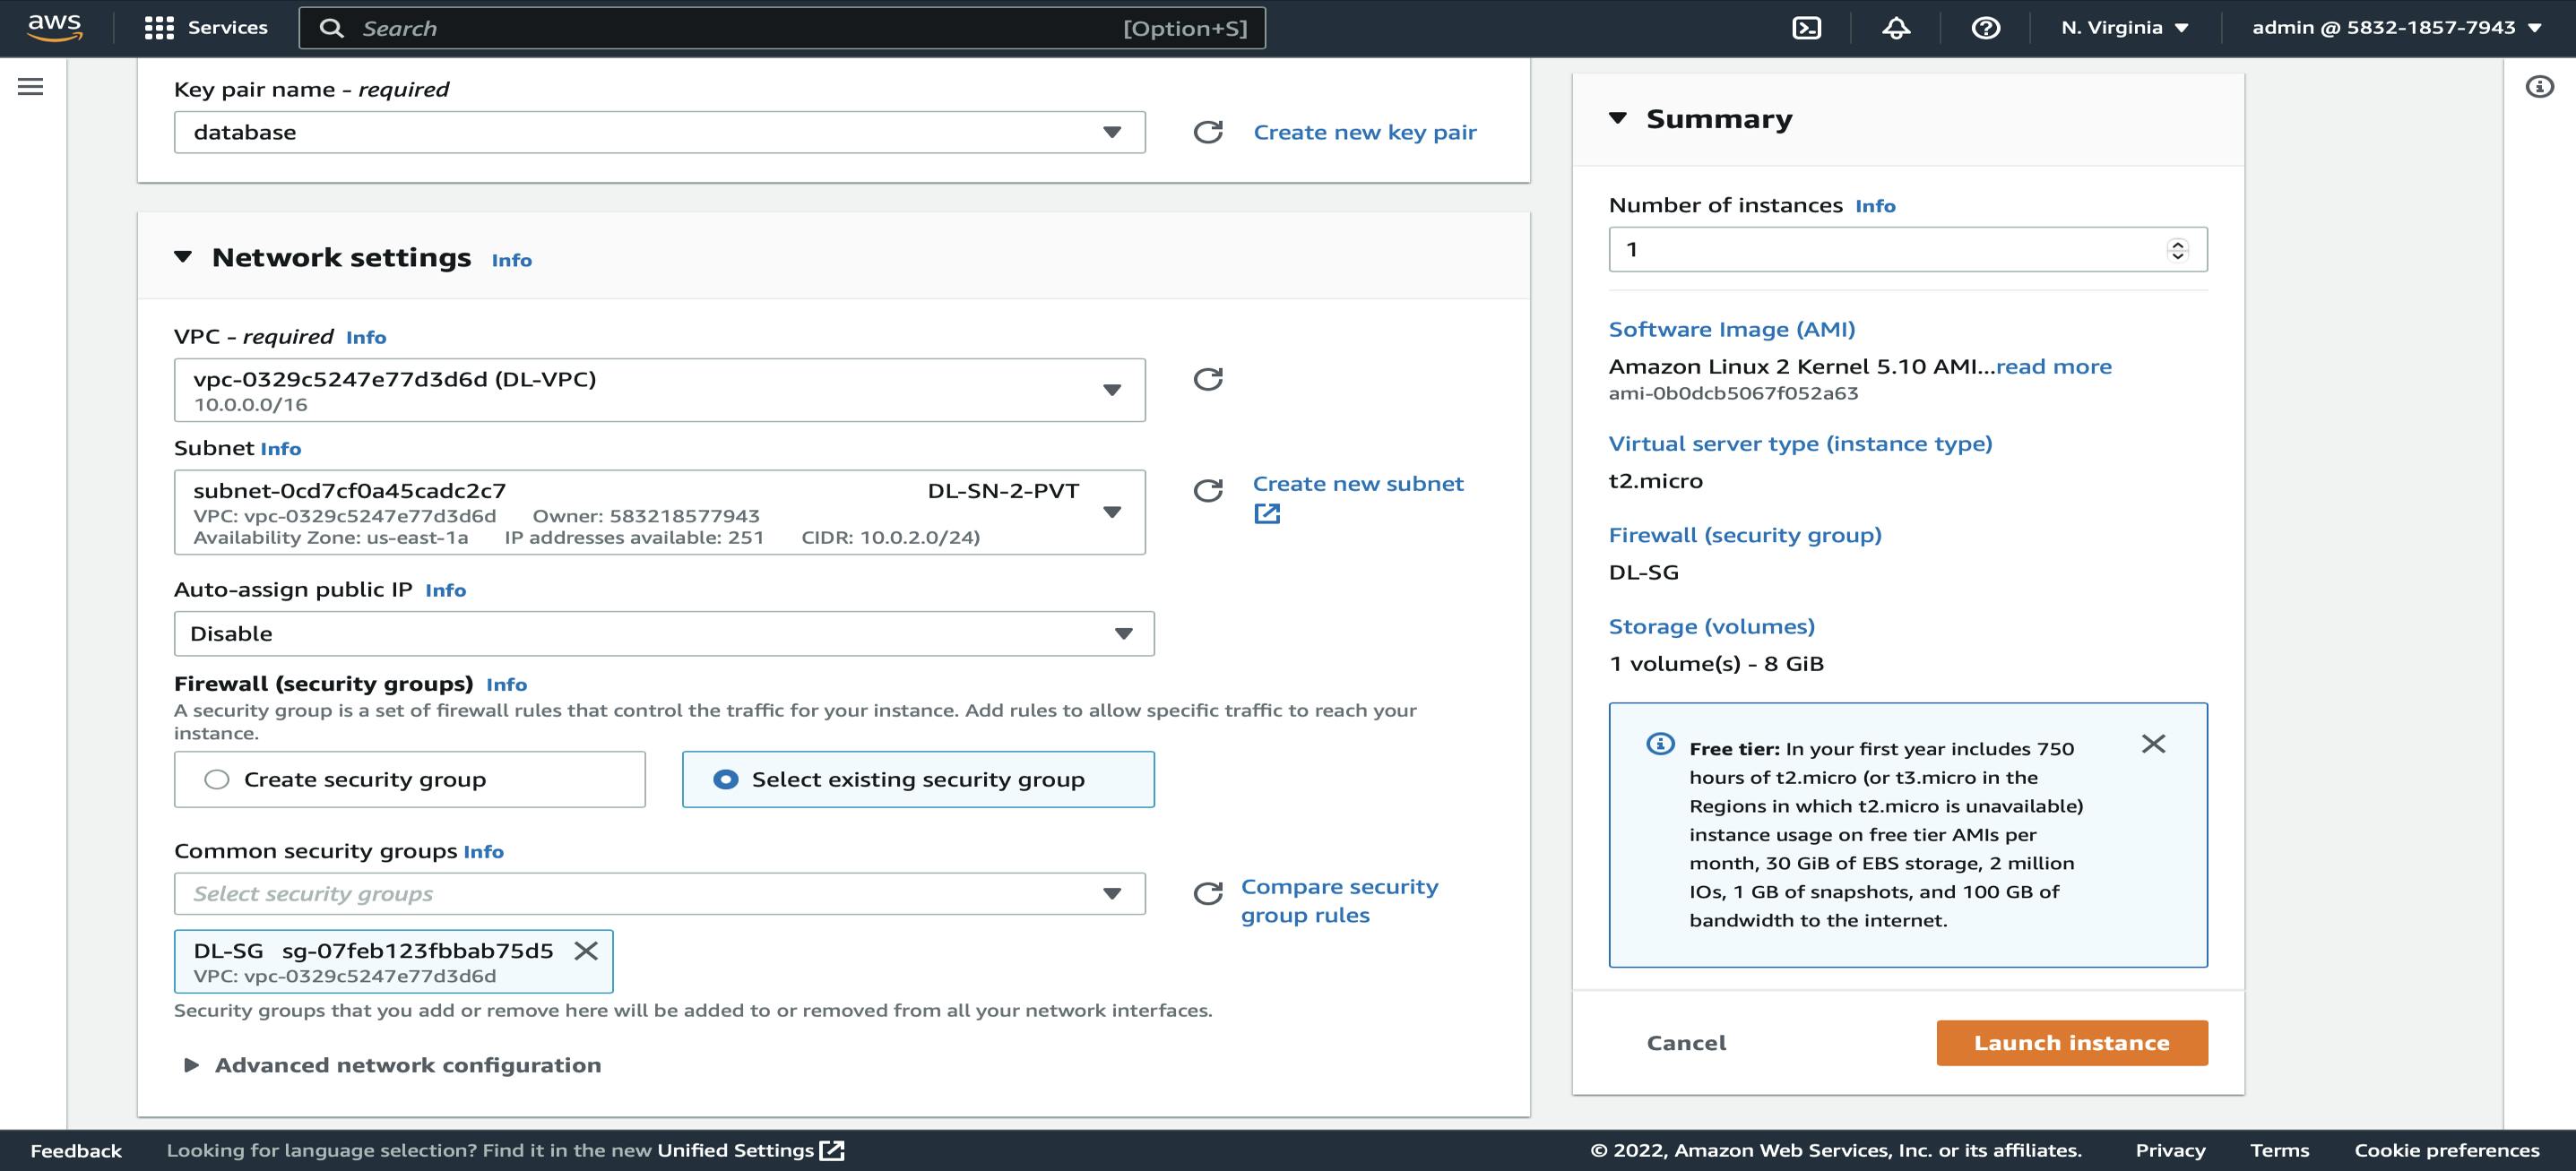
EC2 -> Launch Instance -> Name -> Create Key Pair -> Network Settings (select VPC(DL-VPC), Subnet (DL-SN-1-PUB) and Security Group (DL-SG))
We are launching this web server in public subnet 1 and now will launch another web server 1 in the public subnet which is DL-SN-3-PUB. We can use the same key pair used for the web server or we can create a new one. But all the networks' settings should be the same.
After launching 2 web servers in public subnets now we must launch database servers in private subnets.
For launching Database servers,
EC2 -> Launch Instance -> Name -> Create Key Pair -> Network Settings (select VPC(DL-VPC), Subnet (DL-SN-2-PVT) and Security Group (DL-SG))
Now similarly will launch another database server in a private subnet by selecting DL-SN-4-PVT subnet.
Now try to connect all the servers launched in public and private subnets.
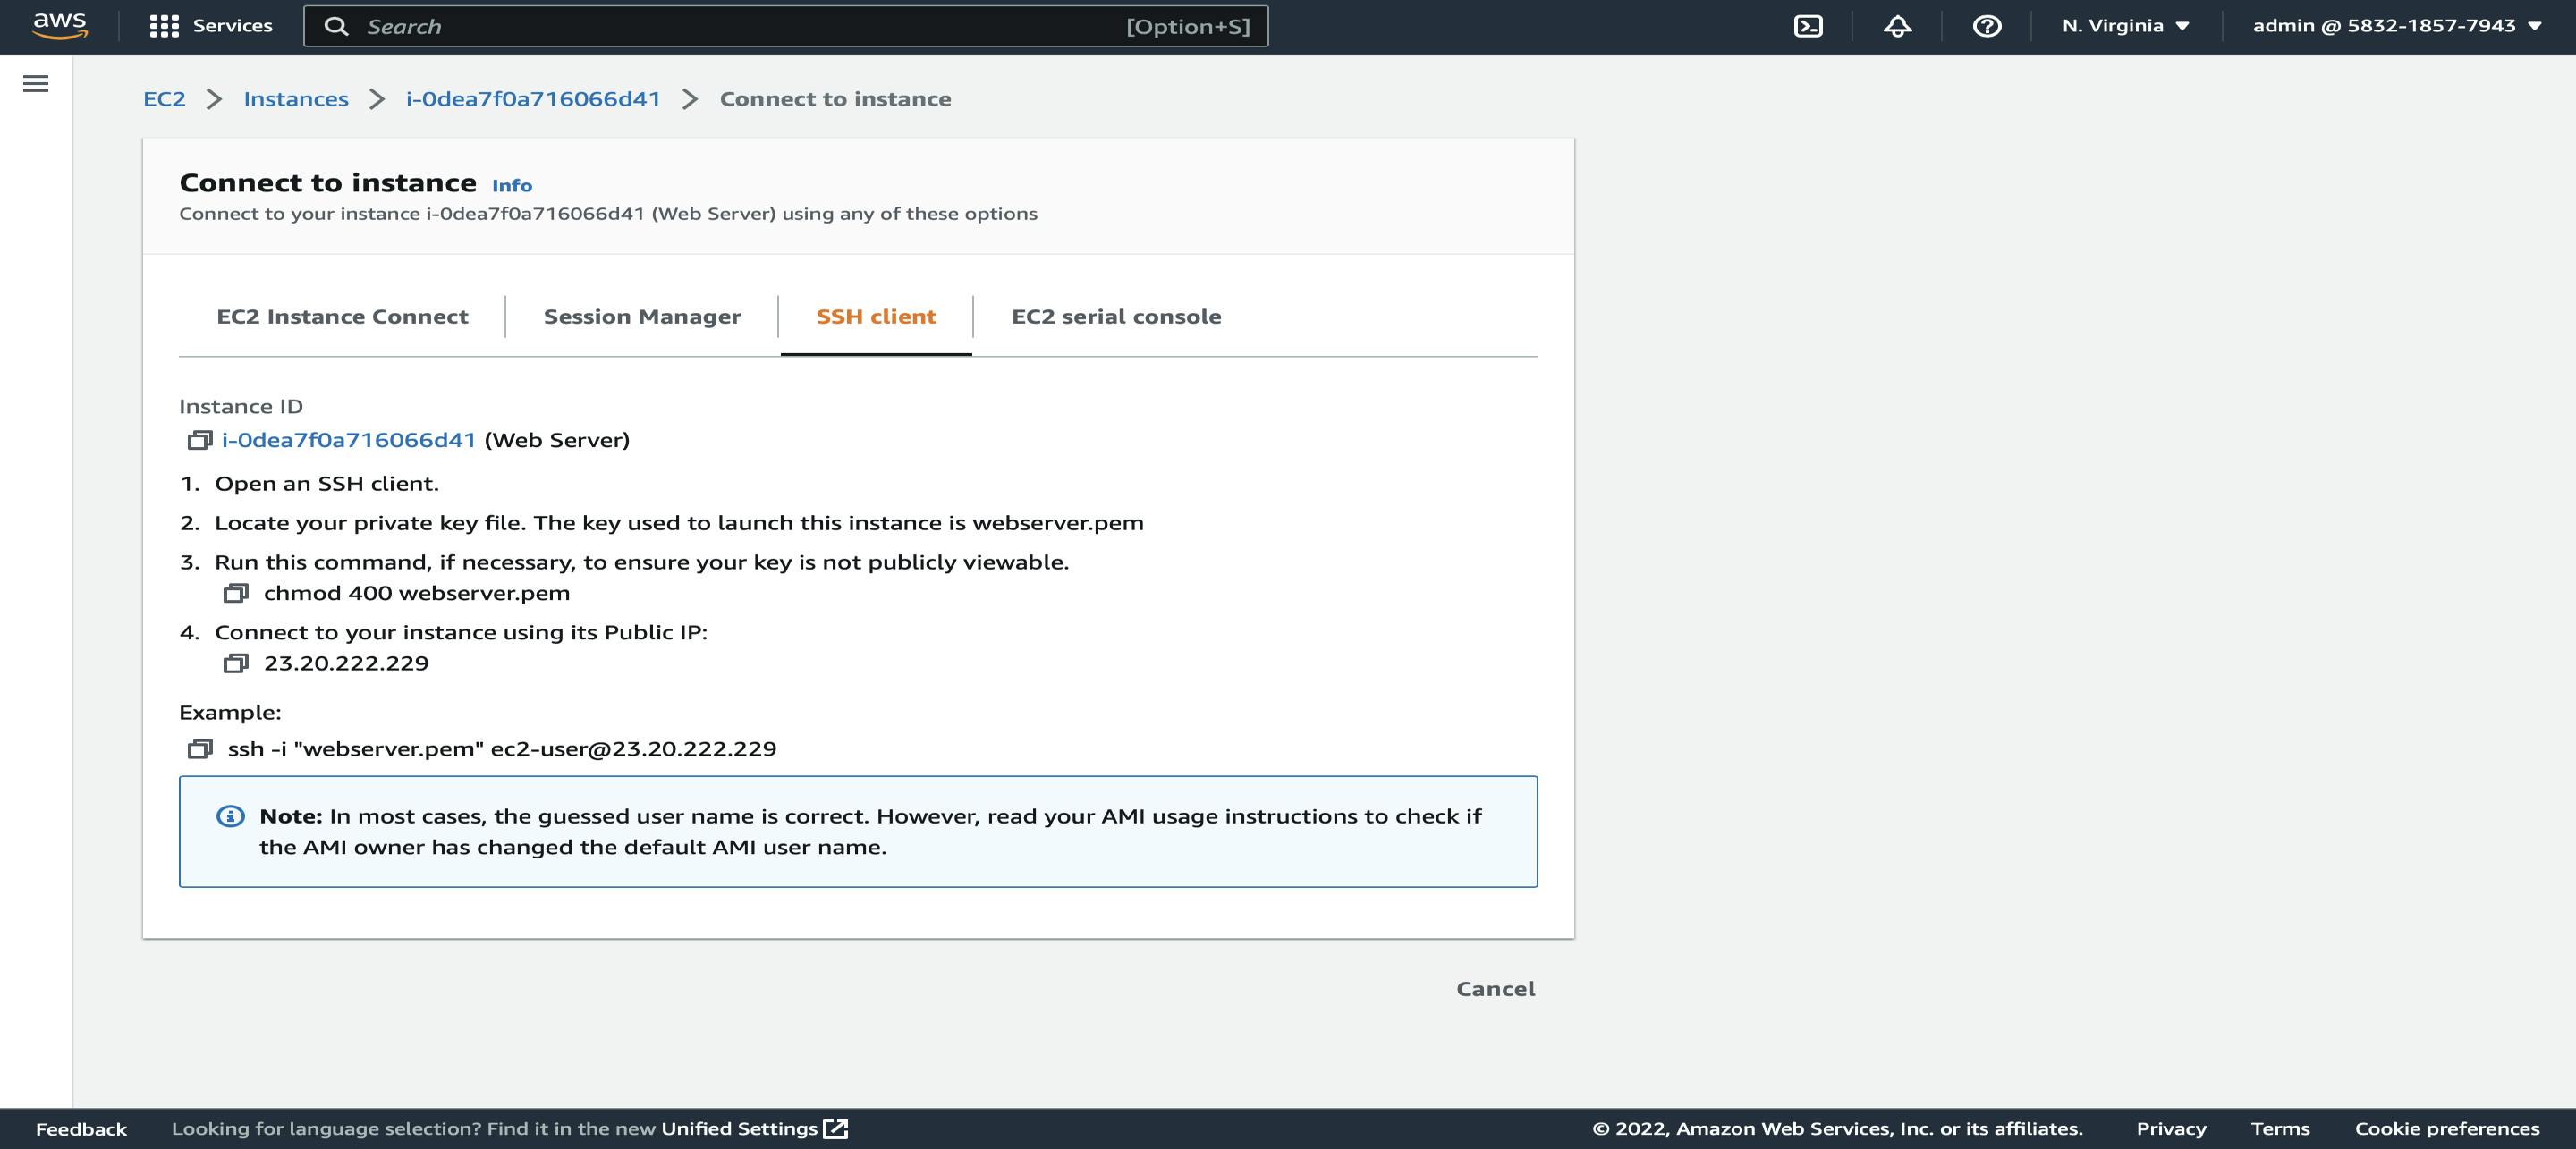
For connecting to this instance select instance -> click on connect -> ssh client -> copy the command mentioned in the example and go back to the terminal or gitbash and paste the command for connecting to the following instance.
Before that make sure that you go to downloads and check the .pem file which we have downloaded while creating the instance (key pair).
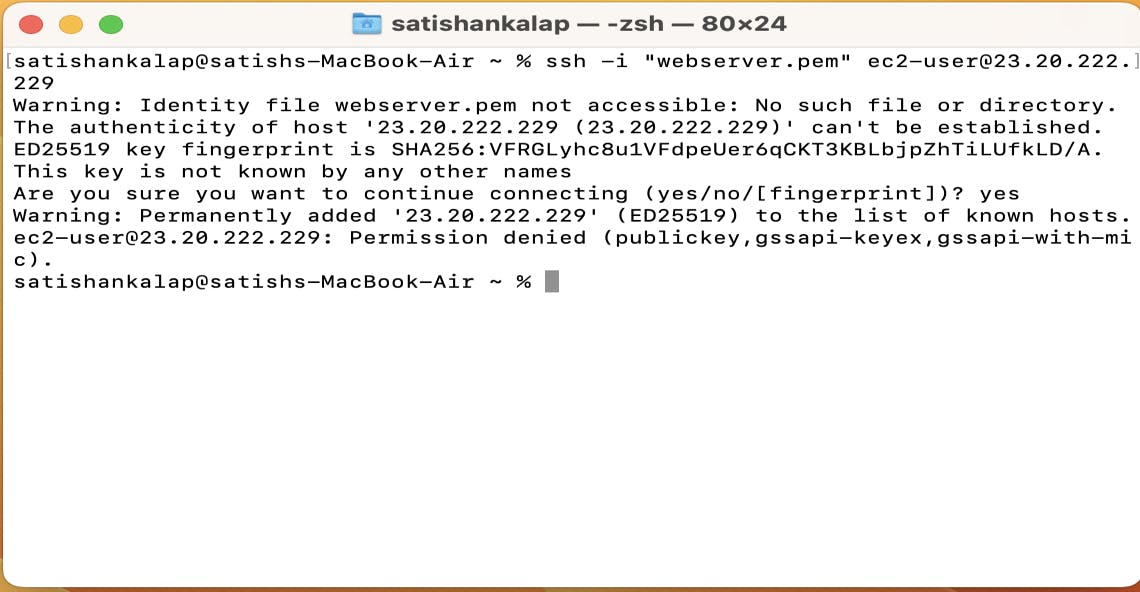
I have tried to connect to the instance by pasting the command, but it will give us an error because we need to change the permissions of that .pem file to ensure it's not visible publicly.
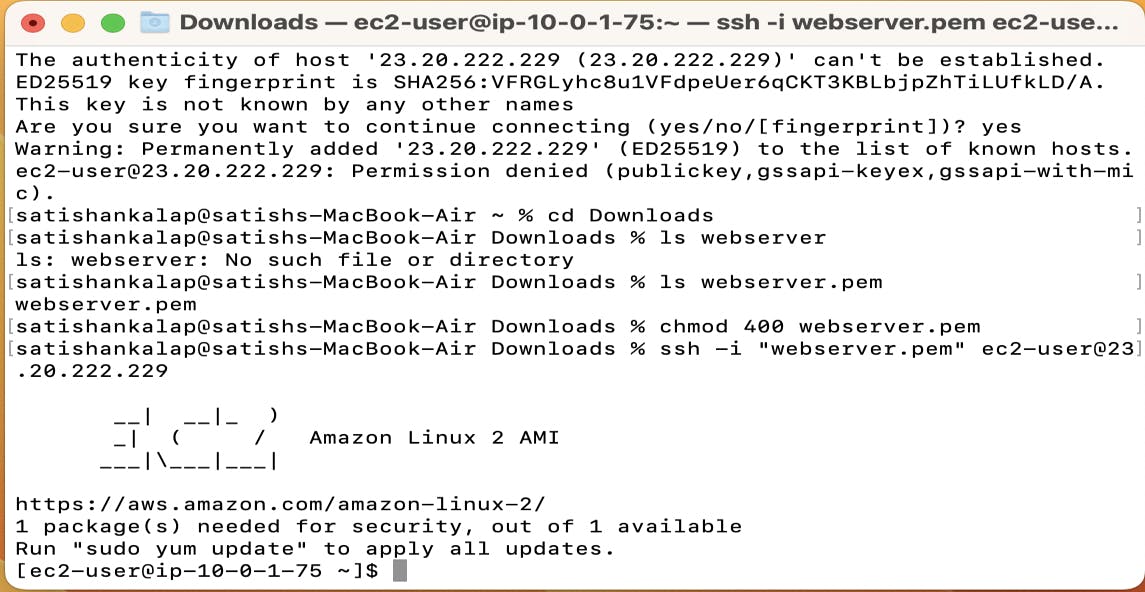
Now after changing the permissions here, I can login into my Webserver located in public subnet. Now try to connect the Database server located in a private subnet we will not be able to connect it because it does not have access to the internet, but we can connect it through our web server as all our subnets are connected internally.
Connecting to an instance located in Private Subnet internally.
To connect to the Database server located in a private subnet from the Webserver located in a public subnet we need to copy the .pem file of the Database server to the Webserver.
For copying the .pem file from the Database server to the Webserver, here we use the following command.
Ex:
scp -i <webserver.pem> <file that we need to copy> ec2-user@< Public IPv4 address of webserver>:˜
scp -i webserver.pem database.pem ec2-user@23.20.222.229:˜
Or
scp -i webserver.pem database.pem ec2-user@23.20.222.229:/home/ec2-user
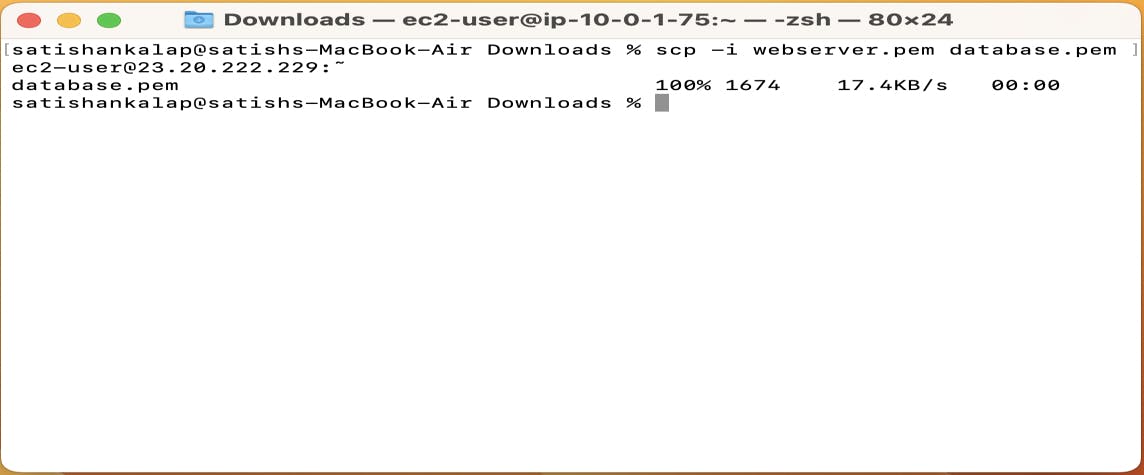
Now connect to the webserver instance and check whether the database.pem file copied or not?

I can see that the database.pem file is copied into the webserver. Now use the same commands which we use to connect to the instance from the webserver.
Select Database instance -> connect -> copy the command and paste it into the webserver
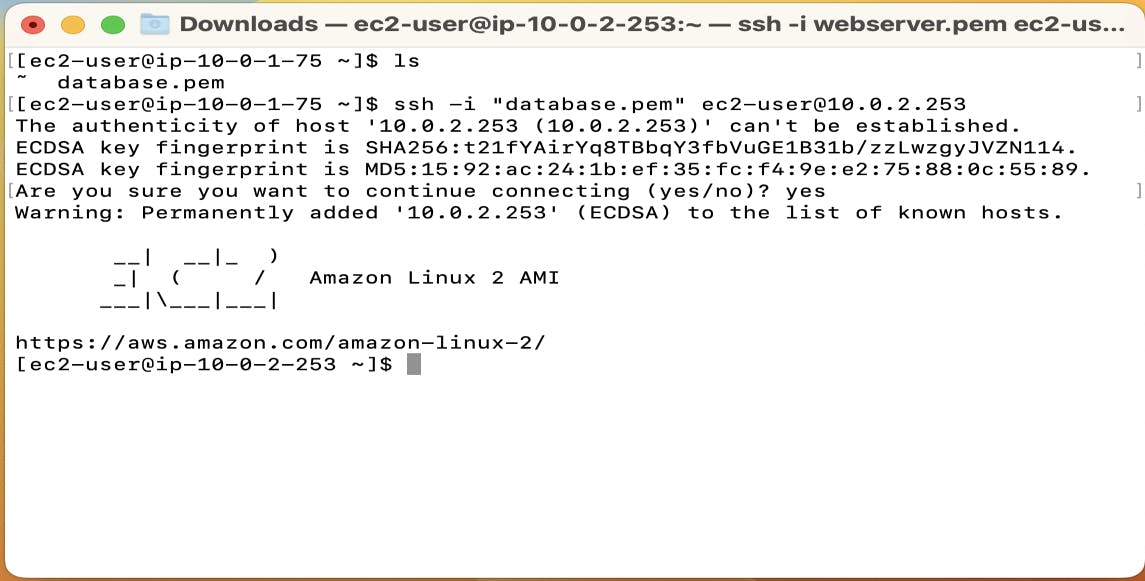
Now we can see that we are connected to the Database server from the public subnet to the private subnet.
We can connect to the Database server but what if we want to install MySQL in the Database server, we need access to the internet to download MySQL. And for private subnets there's no Internet Gateway.
In this case, NAT Gateway plays a crucial role.
Configuring NAT Gateway and Installing MySQL in Database Server.
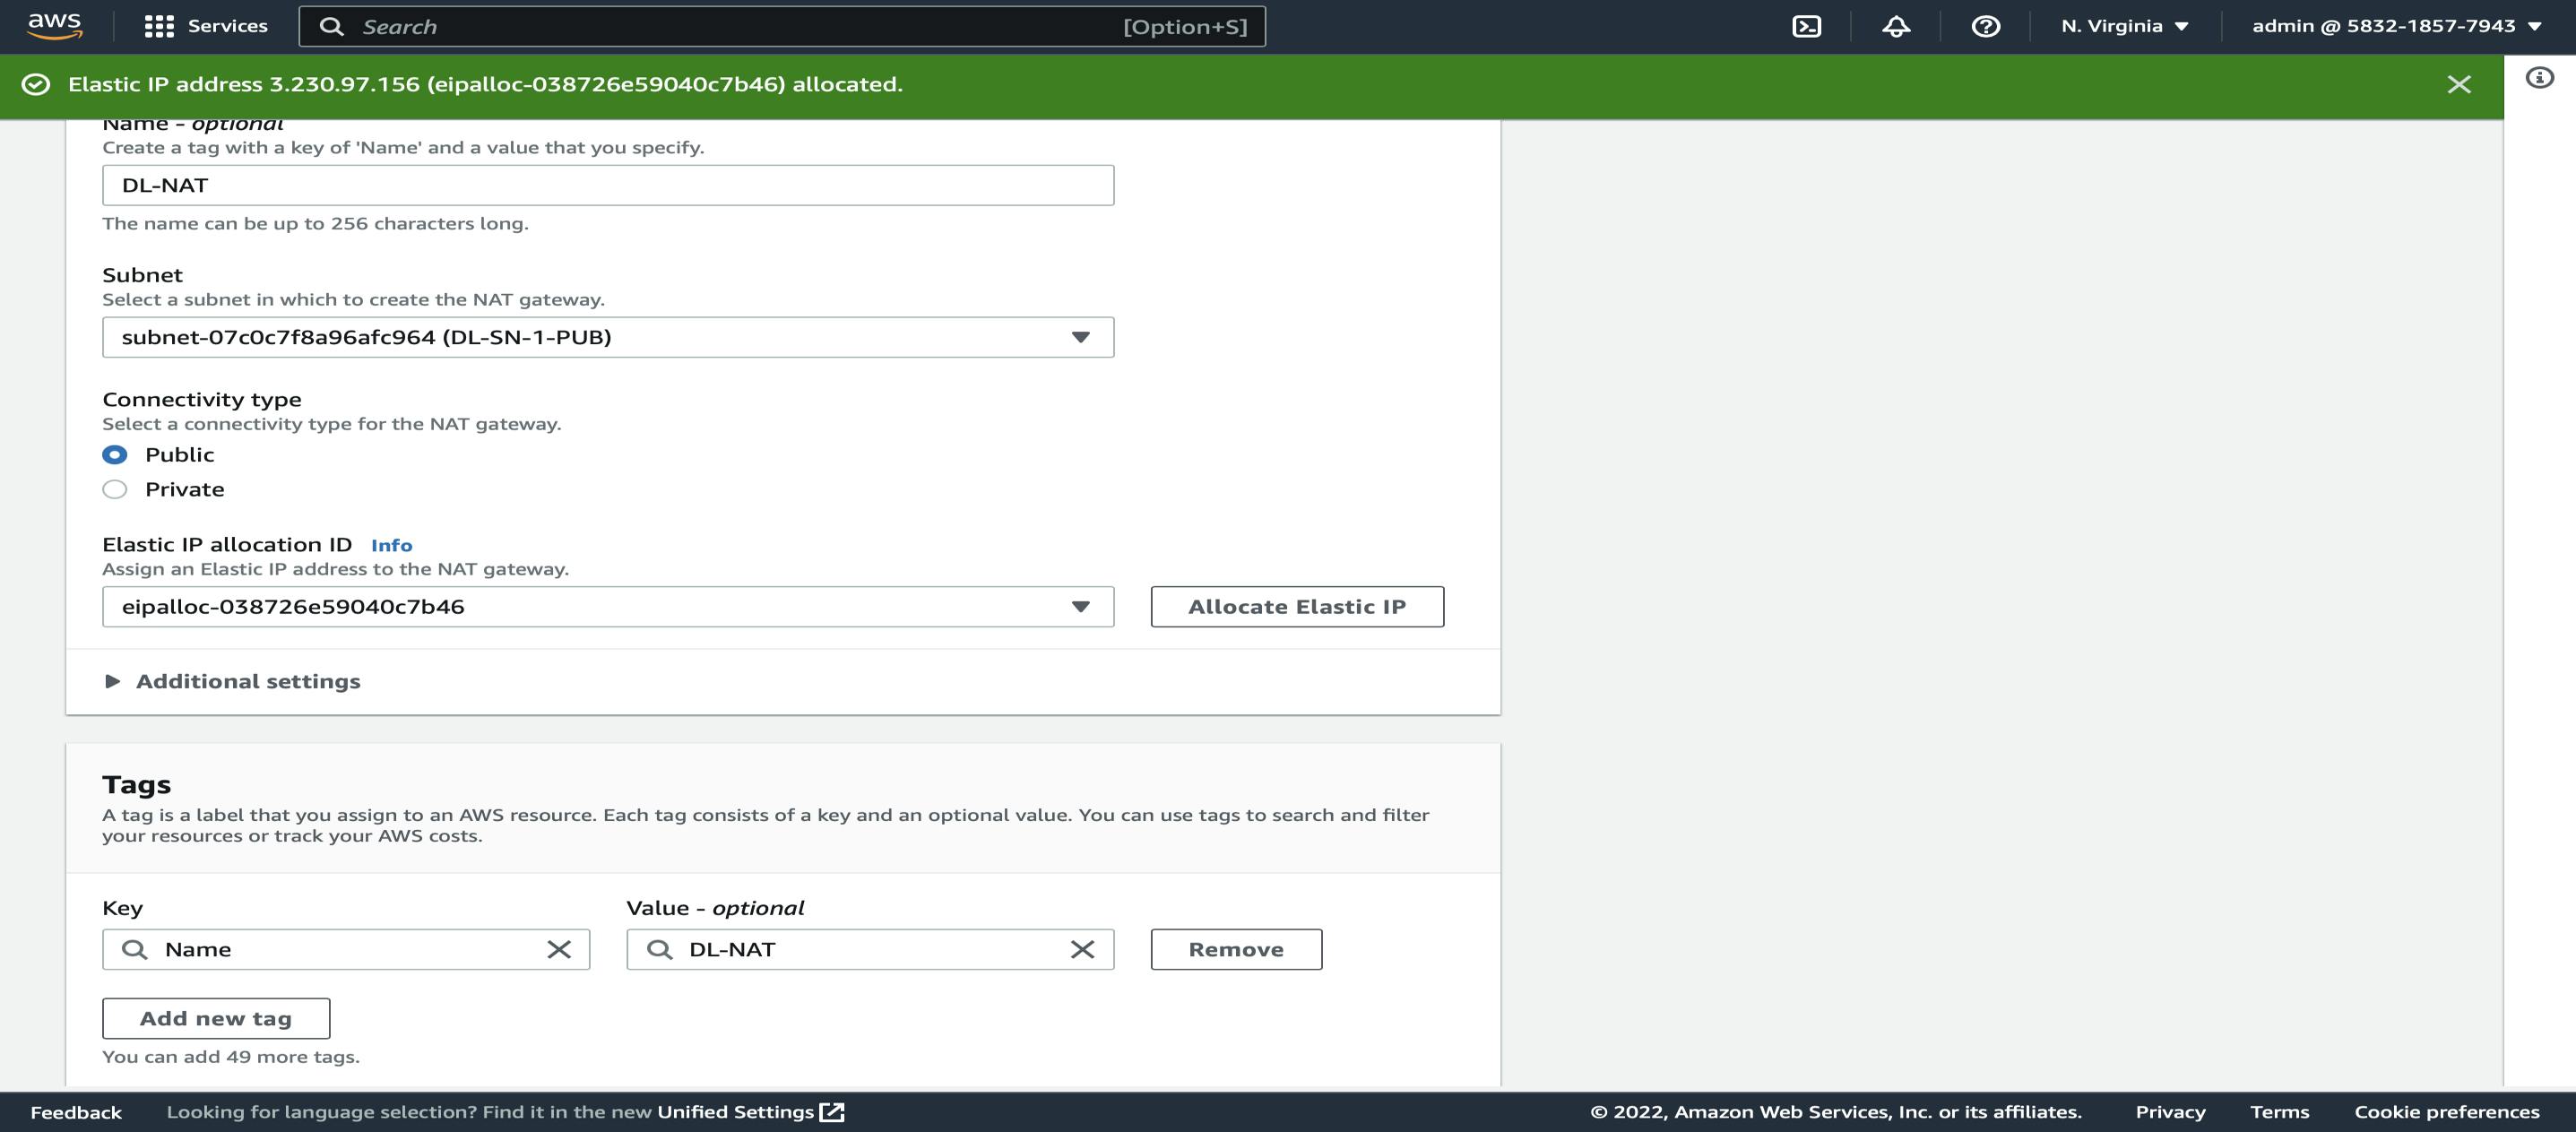
We will first create Nat Gateway, we must create it in a public subnet, such that it will take the request from the Database server and allow it to install and update.
Steps to create NAT Gateway: VPC Dashboard > NAT Gateways > Create NAT Gateway > Select the Public Subnet > Elastic IP allocation: create new EIP > Create NAT Gateway
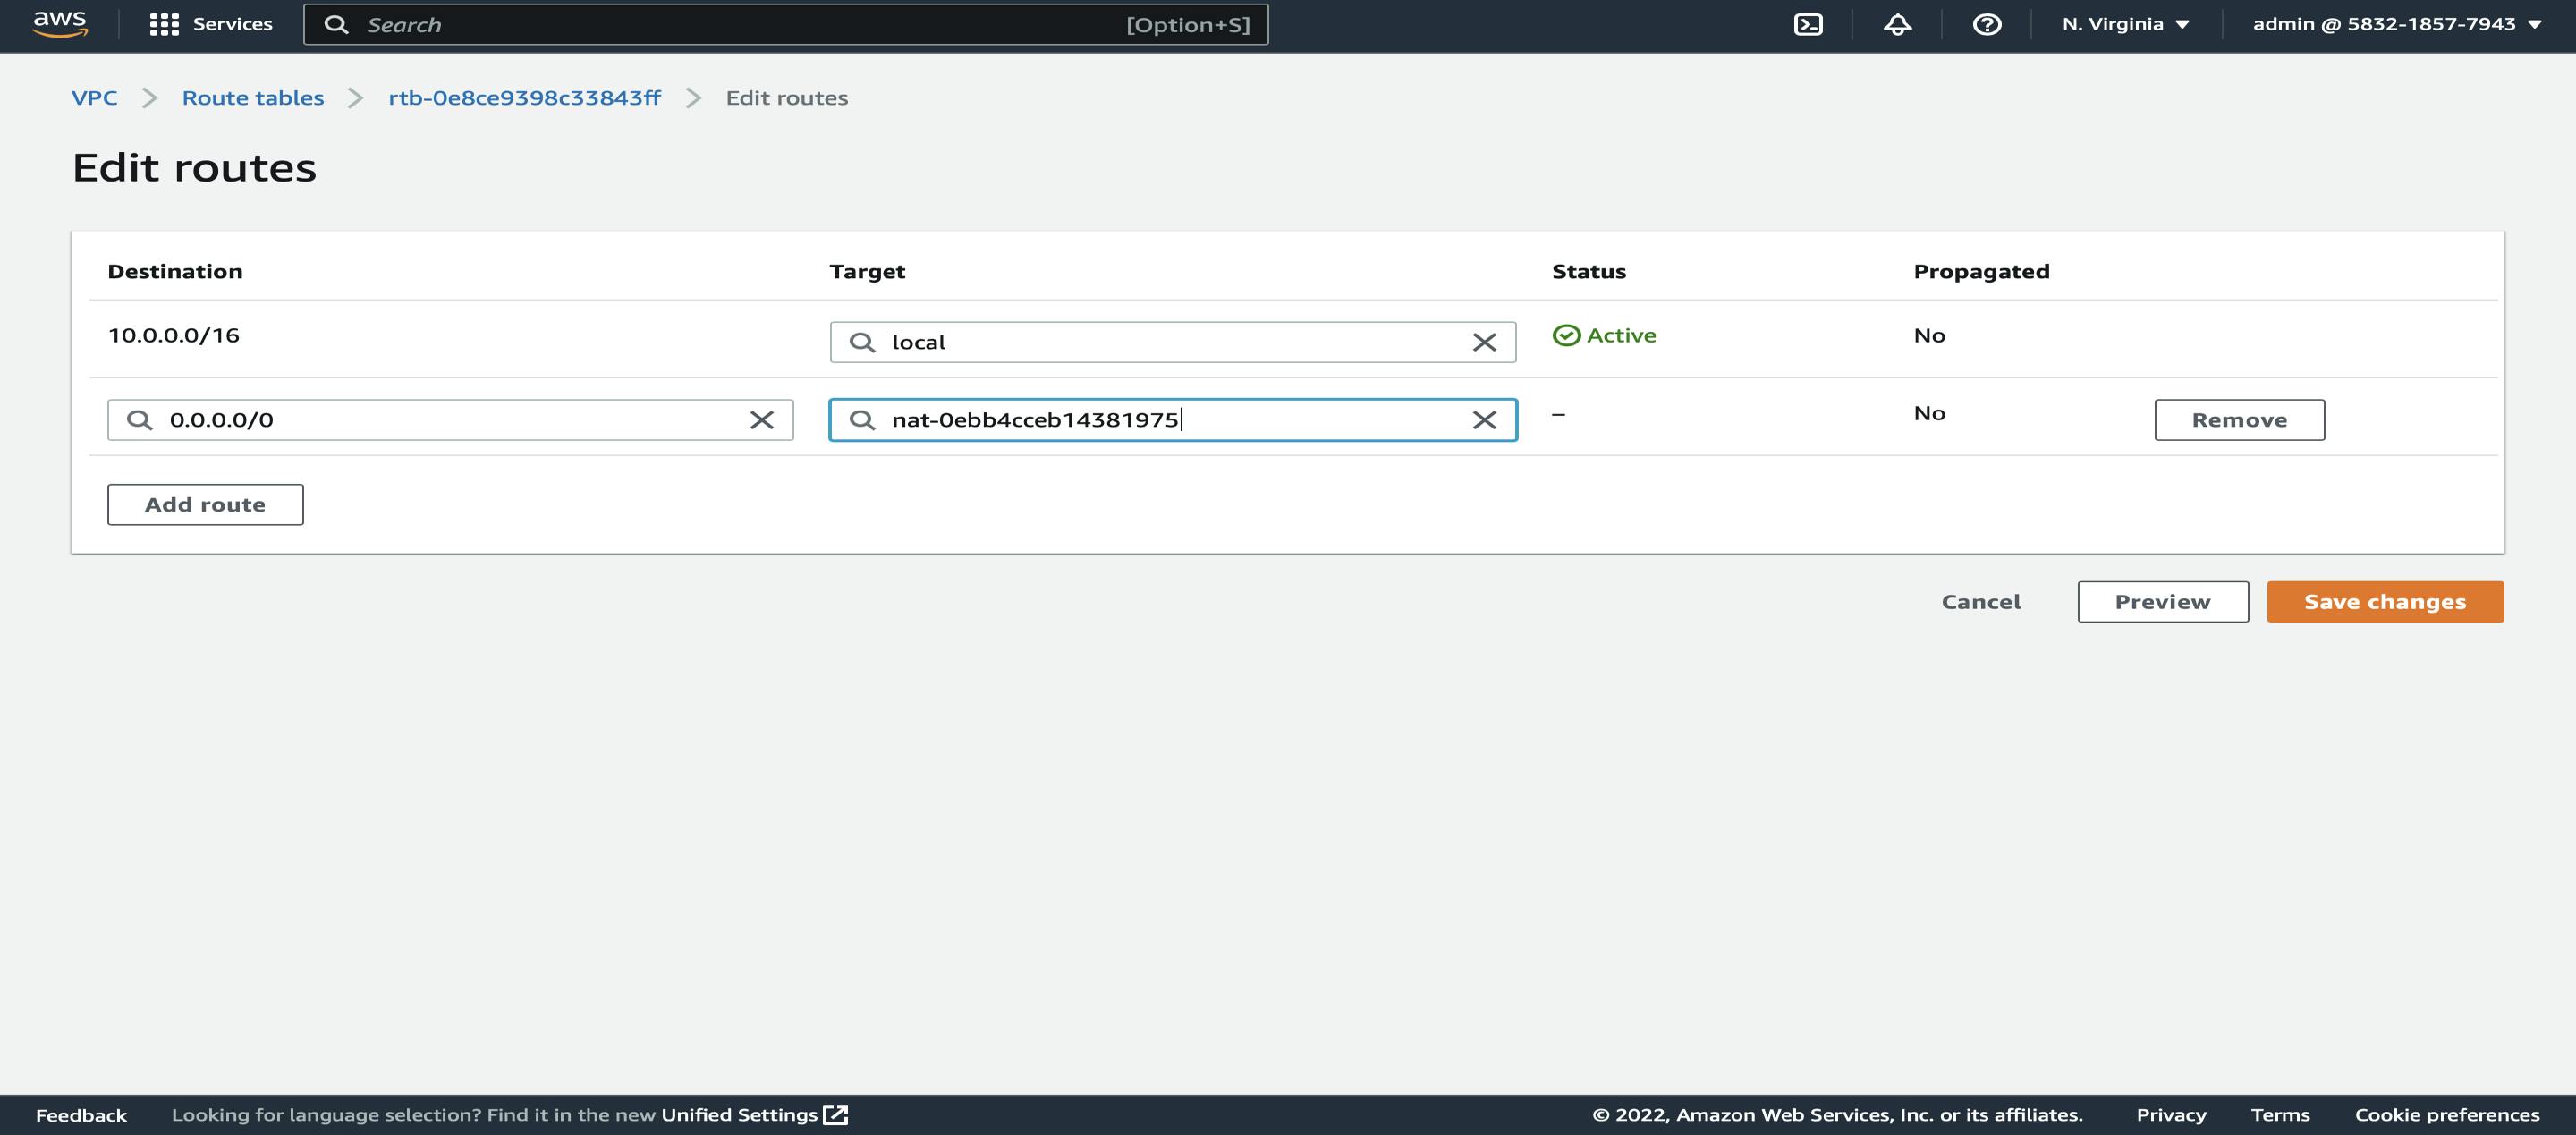
Now after creating the NAT Gateway, we must add it to the inbound rules of the private route table for that,
Go to Route Tables -> select private route -> edit routes -> select the target as NAT Gateway and destination as 0.0.0.0/0
Now you can try downloading MySQL to the database server located in a private subnet.
Go to the terminal where you have already connected it to the Database server from the public subnet. And use the following command to download MySQL.
wget http://repo.mysql.com/mysql-community-release-el7-5.noarch.rpm
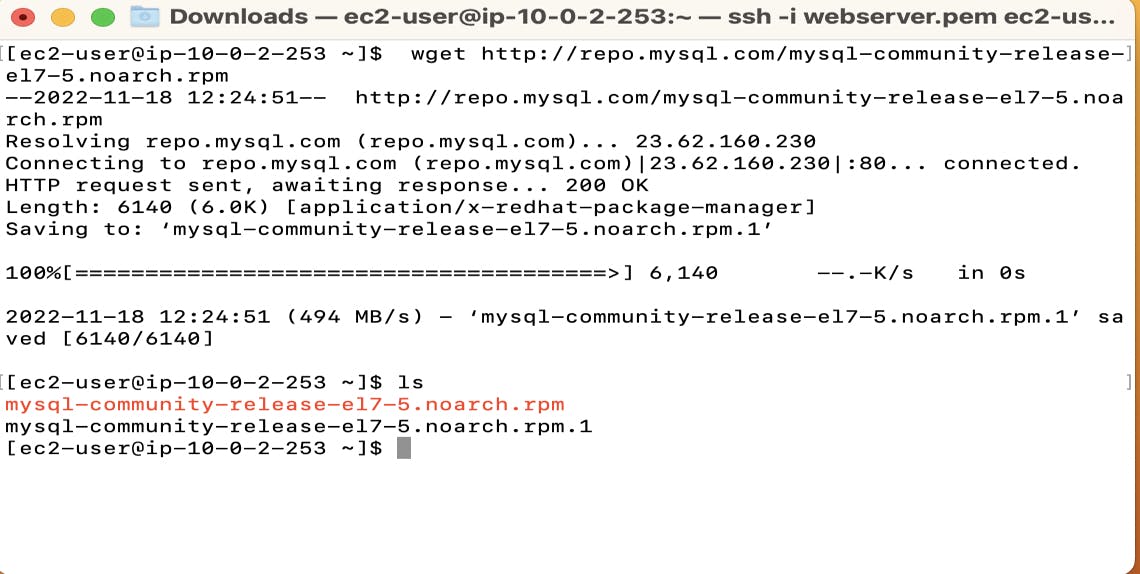
This is how you can access the internet from the private subnet using NAT Gateway.